
A DIY hydroponic system lets you grow herbs, lettuce and even strawberries in water instead of soil. You can build one from mason jars, an old cooler or a few lengths of PVC pipe. Most of these setups cost less than a store kit, and many need no pump at all.
I started with one jar of basil on my kitchen windowsill. Within a month, I was cutting fresh leaves for pasta twice a week. After that, I built bigger setups for the patio and the balcony.
If this is your first DIY hydroponic system, start with a no pump design. The jar and tub setups forgive small mistakes, and you can add pumps and pipes later.
Good to know: Roots in any DIY hydroponic system need water, nutrients and oxygen. They also need darkness, so cover every reservoir. Light on the water feeds green algae, and algae steals oxygen from your plants.
In this post: 17 ideas
- Mason jar Kratky herb garden
- Recycled bottle wick garden
- Five gallon bucket deep water culture
- Storage tote lettuce bed
- PVC pipe wall garden
- Cedar A-frame NFT garden
- Vertical PVC tower
- Strawberry grow channels
- Kratky salad tubs
- Indoor grow light shelf
- Countertop herb box
- Floating raft bed
- Dutch bucket tomatoes
- Ebb and flow tray
- Picnic cooler lettuce garden
- Rolling cart herb garden
- Ceramic cachepot wick planters
1. Mason jar Kratky herb garden
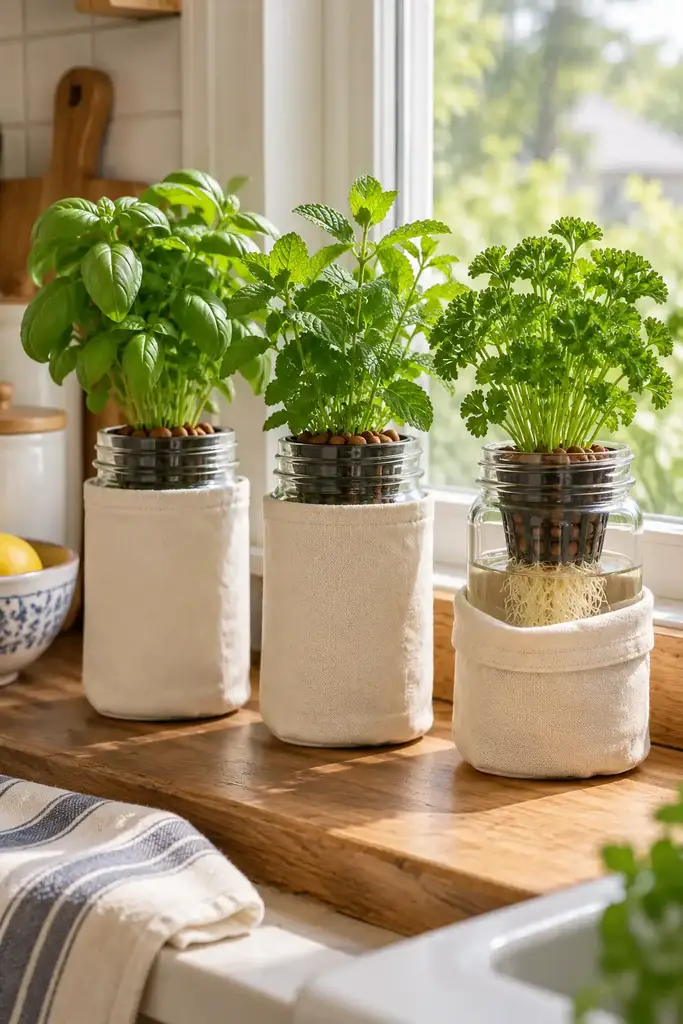
Mason jars make the smallest DIY hydroponic system on this list. Each jar holds one net cup with a single herb plant. As the plant drinks, the water level drops and the roots follow it down.
This passive approach is called the Kratky method. Bernard Kratky developed it at the University of Hawaii, and it needs no pump or power. Slip a cotton sleeve over each jar, or paint the glass, to block light. A sunny window in a farmhouse kitchen gives basil, mint and parsley the six hours of light they need.
Jar tip: Fill the jar until the water just touches the bottom of the net cup. Do not top it up to the brim later. The roots need that growing air gap to breathe.
2. Recycled bottle wick garden
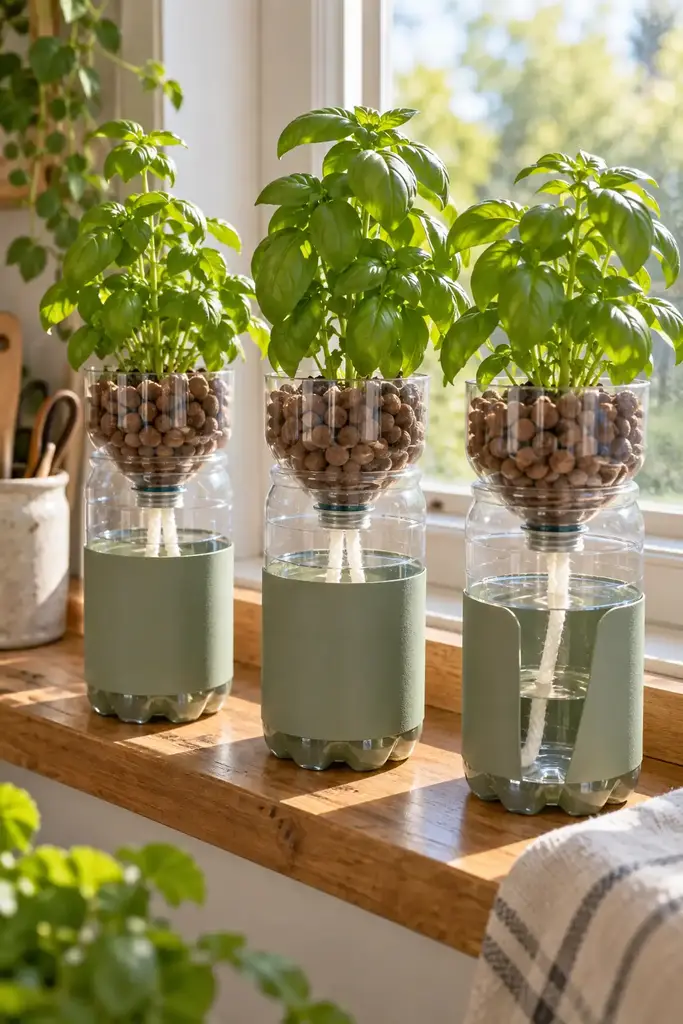
Cut a plastic soda bottle in two, then flip the top half into the bottom half. The upside down neck carries clay pebbles and a small plant. A cotton wick pulls nutrient water up from the reservoir underneath.
This DIY hydroponic system costs almost nothing, and kids enjoy building it. Wrap the lower half in fabric or paint it to keep algae out. Wicks suit small herbs, because they cannot move enough water for thirsty plants like tomatoes. For more easy projects at home, try these relaxing craft ideas.
3. Five gallon bucket deep water culture
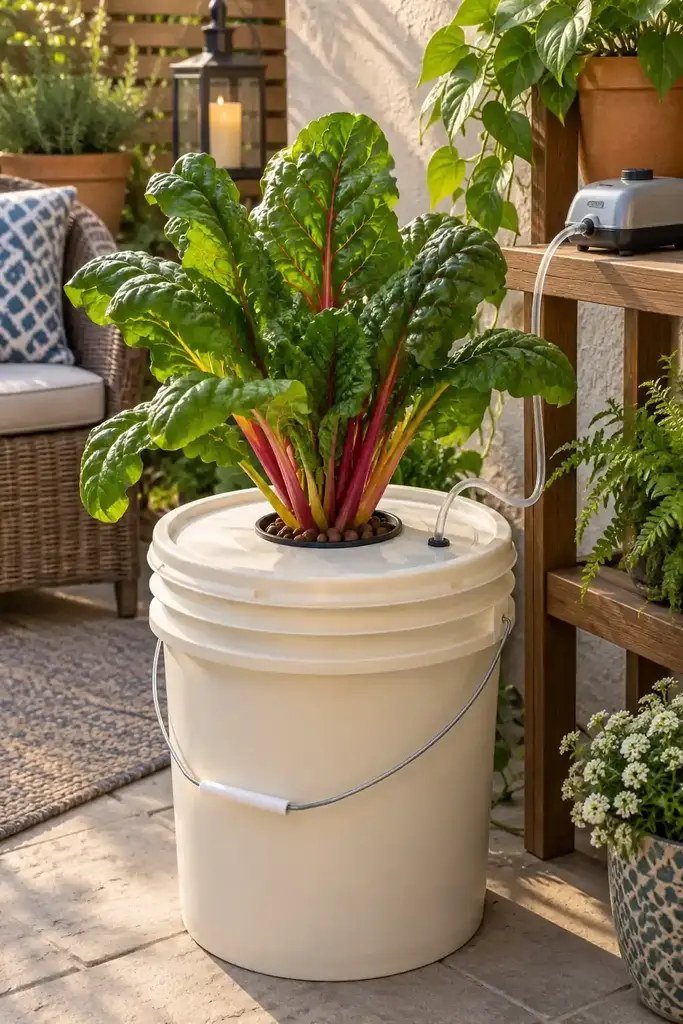
Deep water culture, or DWC, keeps plant roots hanging in an oxygen rich nutrient solution. A single 5 gallon (19 liter) bucket with a lid makes a basic DWC unit. Cut one hole in the lid for a 6 inch net pot.
An aquarium air pump and air stone keep the water full of oxygen. Place the pump on a shelf above the water line, so water cannot siphon back into it. One bucket can carry a big Swiss chard, kale or pepper plant all season. Tuck it into a corner of the patio, and it blends in with your patio decor.
Save money: Ask a local bakery or deli for empty food grade buckets. Many give them away for free. Look for the number 2 (HDPE) recycling symbol on the bottom.
4. Storage tote lettuce bed
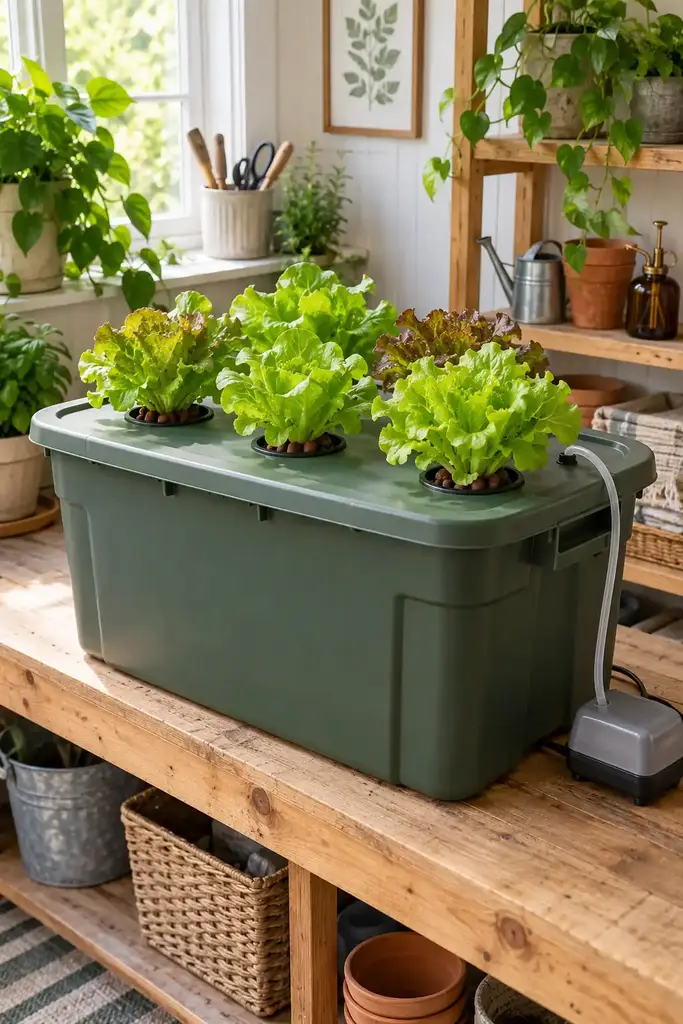
A storage tote makes a DIY hydroponic system big enough for a salad bed. Drill six holes in the lid with a 2 inch hole saw, then add net pots. Six lettuce heads fit in a standard 18 gallon tote.
Choose a dark, opaque tote, never a clear one. Clear plastic lets light in, and algae will coat the roots. A single air stone in the middle covers a tote this size. Expect your first heads of butterhead lettuce in about five to six weeks.
5. PVC pipe wall garden
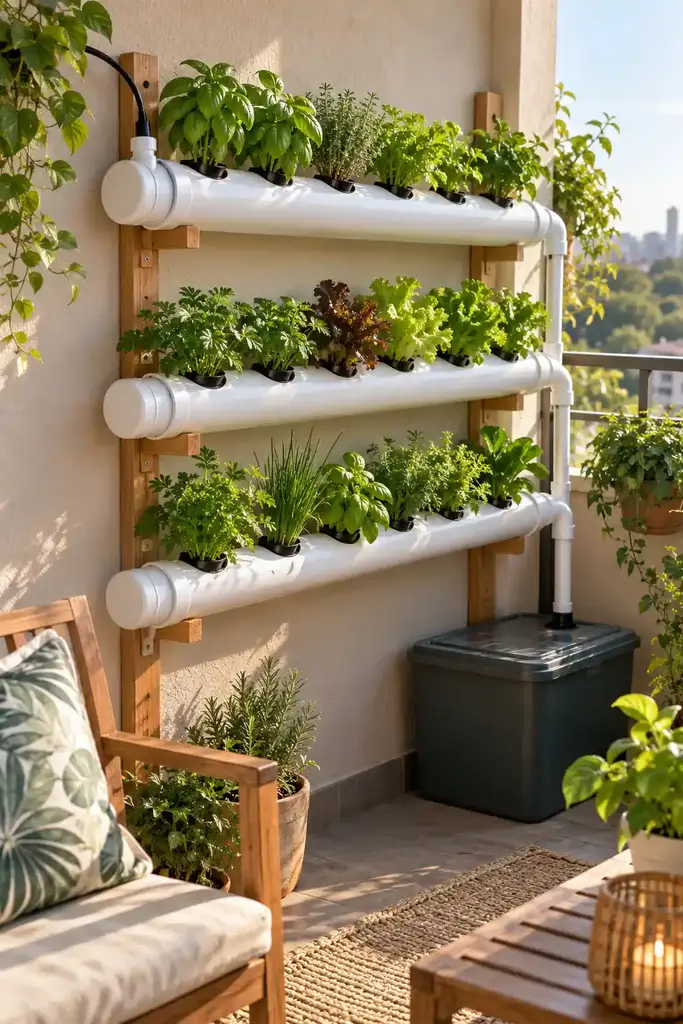
PVC grow pipes turn a bare wall into a herb garden. This DIY hydroponic system uses the nutrient film technique, or NFT. A thin stream of water flows through each sloped pipe and over the roots.
A small submersible pump lifts water from a covered reservoir to the top pipe. Gravity then carries it back down. Give each pipe a slope of about 1 inch for every 3 to 4 feet. That drop keeps the water moving without flooding the net cups. A balcony wall with morning sun works well. For the rest of the space, try these outdoor ideas.
6. Cedar A-frame NFT garden
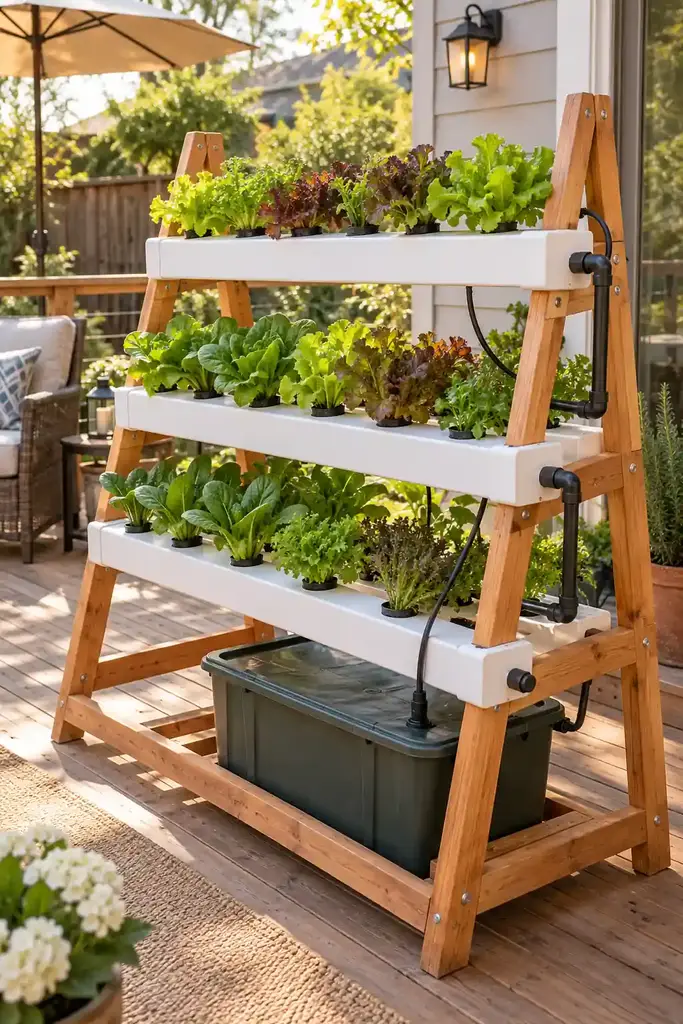
An A-frame packs three rows of grow channels into a narrow footprint. The angled legs hold each row at a different height, so every plant gets light. Cedar holds up outdoors without paint.
This DIY hydroponic system works on the same NFT idea as the wall garden. A pump feeds the top channel, and water drains through each level to the reservoir underneath. Lettuce, spinach and bok choy all fit in 2 inch net cups. Set it on a deck beside your seating, or under a pergola for afternoon shade.
7. Vertical PVC tower
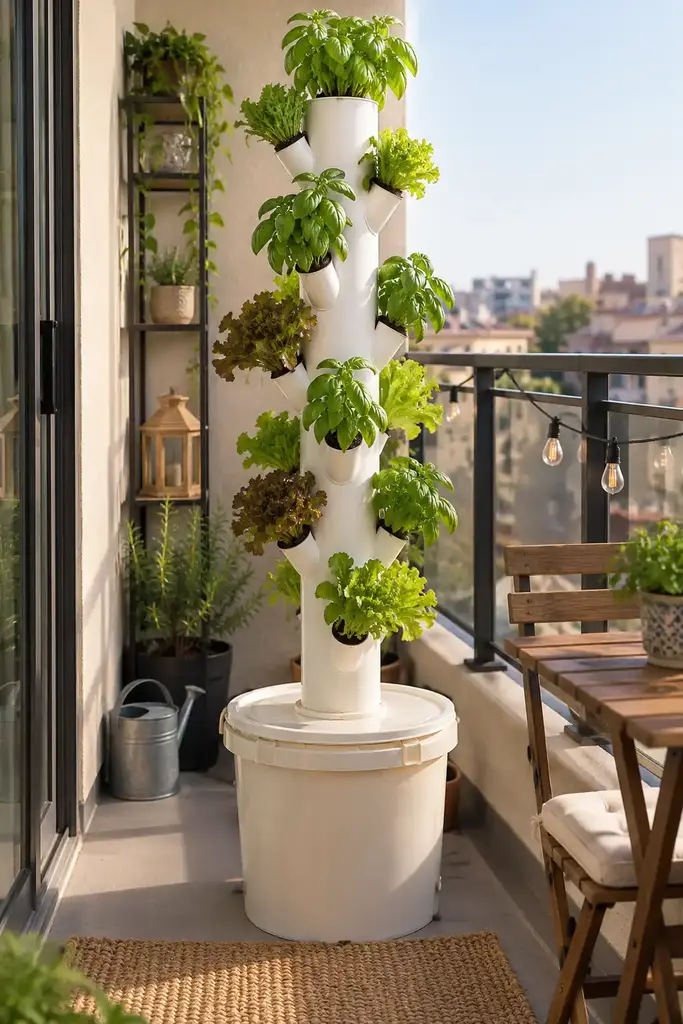
A tower grows a lot of food on a few square feet of floor. Cut angled pockets into a 4 inch PVC pipe in a staggered pattern. Then mount the pipe through the lid of a reservoir bucket.
In this DIY hydroponic system, a pump sends water to the top. It then trickles down past every root. Twelve to twenty plants fit on one tower, depending on its height. Keep tall crops like kale near the bottom, so they do not shade the basil above.
Balcony tip: Check how much weight your balcony can carry before you build. A full 5 gallon reservoir weighs about 42 pounds (19 kg) on its own.
8. Strawberry grow channels
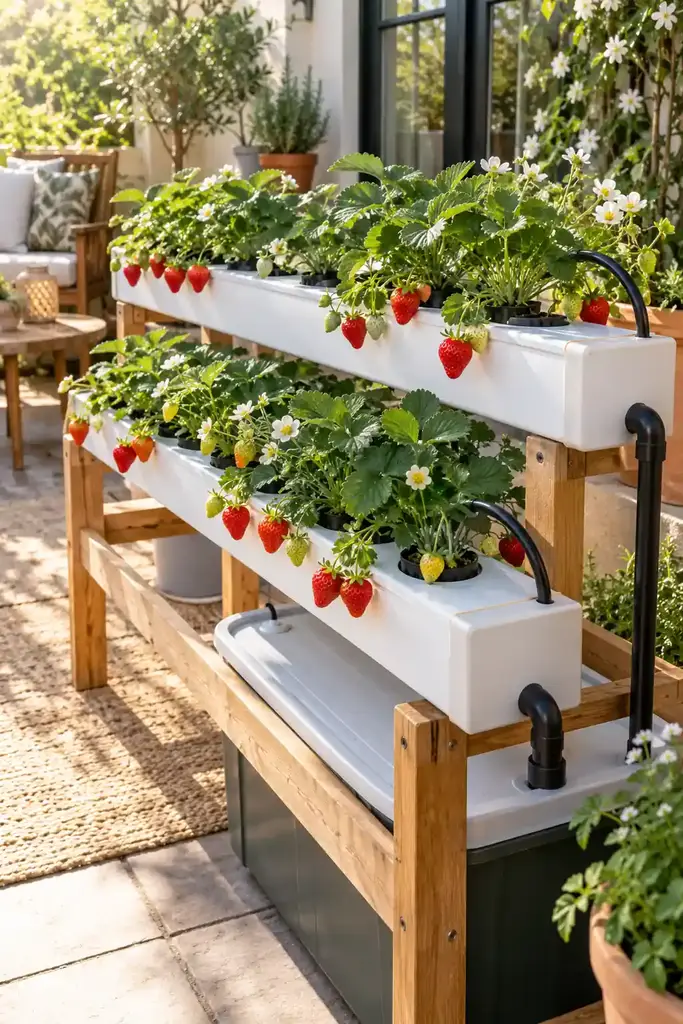
Strawberries hang over the edge of a grow channel, so the fruit stays clean. This DIY hydroponic system uses two covered channels on a wooden frame. A pump drips water into one end, and the other end drains back to the reservoir.
Start with day neutral varieties such as Albion or Seascape. They flower and fruit through summer and into fall instead of once in June. Strawberries like a slightly acidic solution, around pH 5.5 to 6.2. Pick the berries when they turn fully red, because they stop ripening once you pick them.
 You may also like20 DIY Christmas Earrings That Are Quick to Make
9. Kratky salad tubs
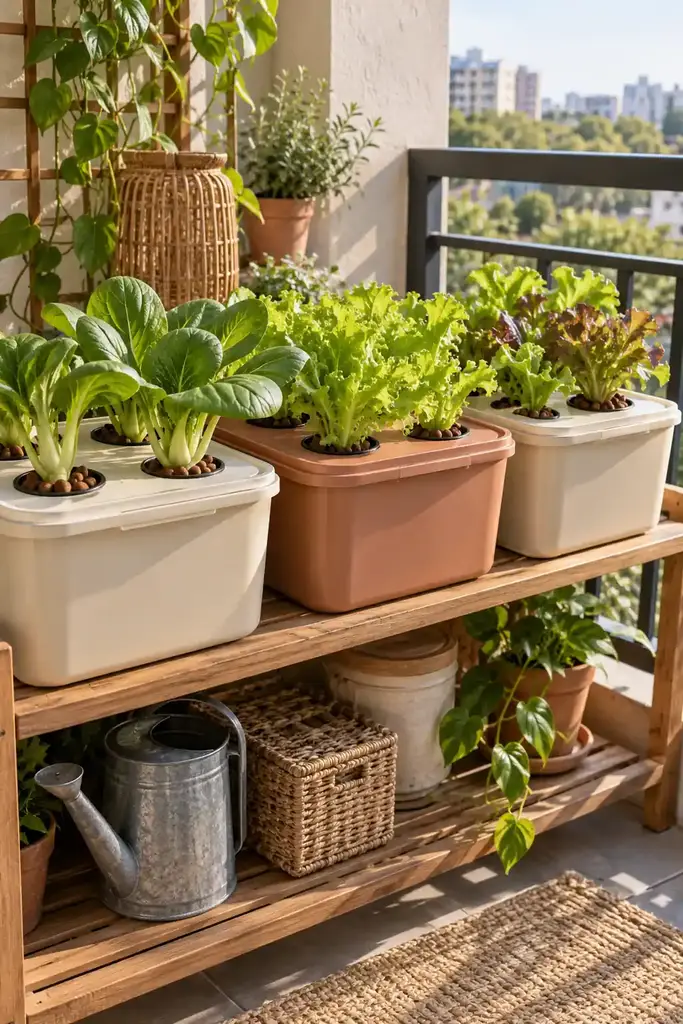
Old food storage tubs make a no pump salad garden. Cut two or three holes in each lid and fill the net pots with clay pebbles. Then fill the tub with nutrient water and leave it alone.
Like the jar method, the plants drink the water down over several weeks. One tub can take a head of lettuce or bok choy to harvest without a refill. Use opaque tubs, or spray paint clear ones on the outside. This cheap DIY hydroponic system lets you test the method before you buy pumps.
Harvest tip: Pick the outer lettuce leaves first and leave the center growing. You can cut from one plant several times. These fridge organization ideas help the leaves stay crisp after you pick them.
10. Indoor grow light shelf
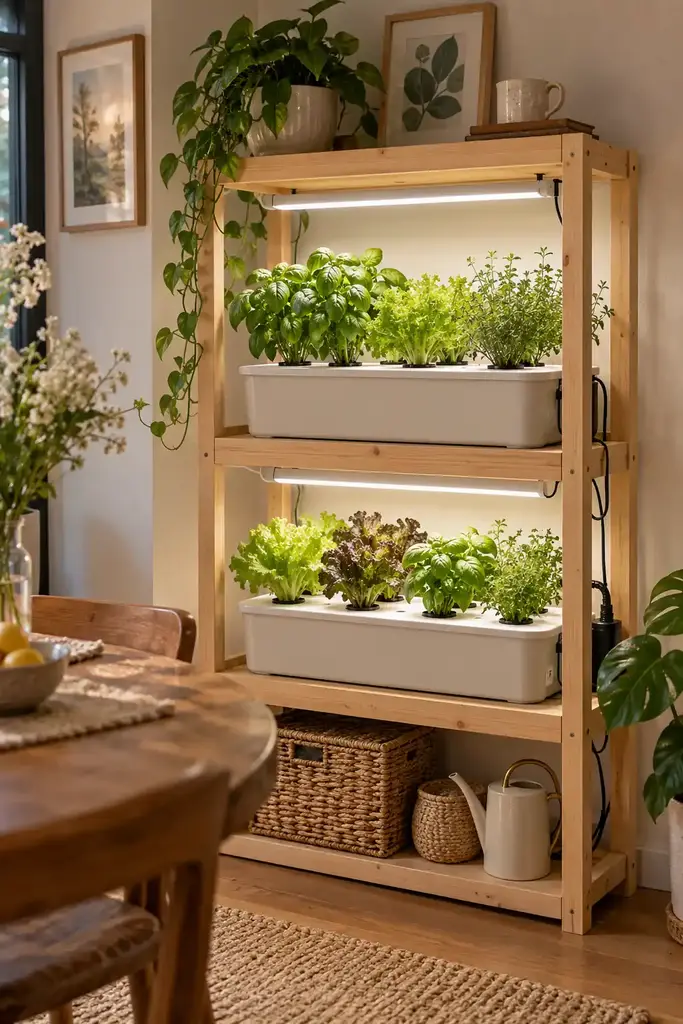
A wood shelving unit becomes an indoor farm with a few LED grow bars. Each shelf has a lidded reservoir with net cups of herbs. The lights hang about 6 to 12 inches above the leaves.
Set the lights on a cheap outlet timer for 14 to 16 hours a day. Keep cords and plugs on the side away from the water. This DIY hydroponic system fits a dining nook or a dim studio apartment.
11. Countertop herb box
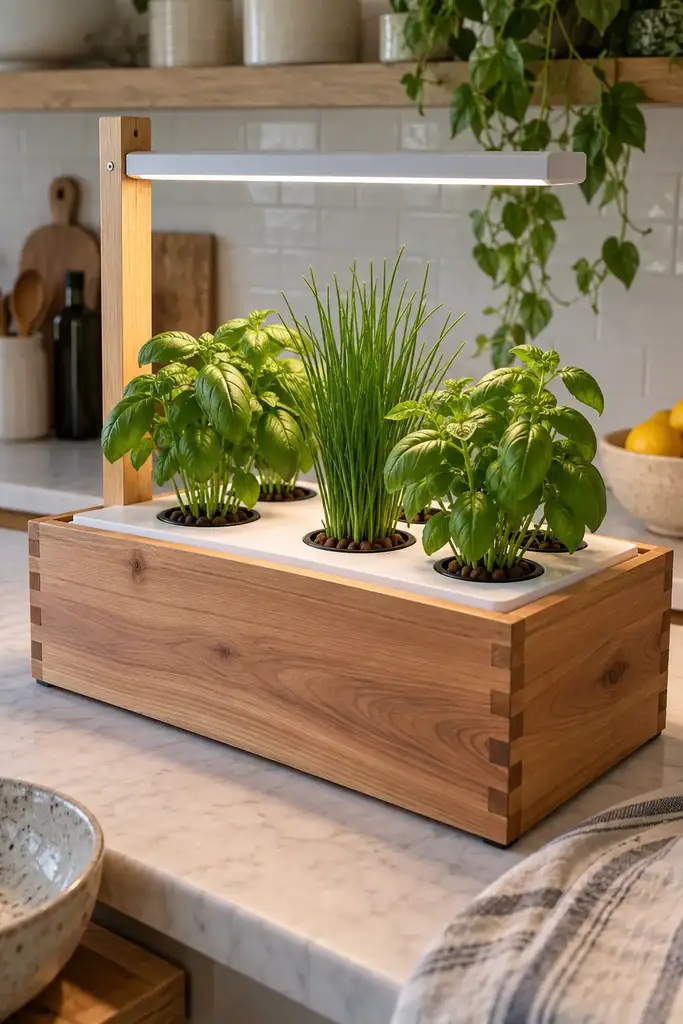
A cedar box can hide a plain plastic reservoir and make it look like furniture. This countertop DIY hydroponic system holds four net cups of basil and chives. A slim grow light mounts on a wooden upright behind the box.
Line the box with a watertight container that has its own lid. Wood swells if it stays wet, so keep the cedar dry. Basil grows fastest between 70 and 80°F (21 to 27°C). The warm wood also suits a Japandi kitchen with clean, natural tones.
Light tip: Countertop herbs rarely get enough window light in winter. A 10 to 20 watt LED strip stops basil from stretching and turning pale.
12. Floating raft bed
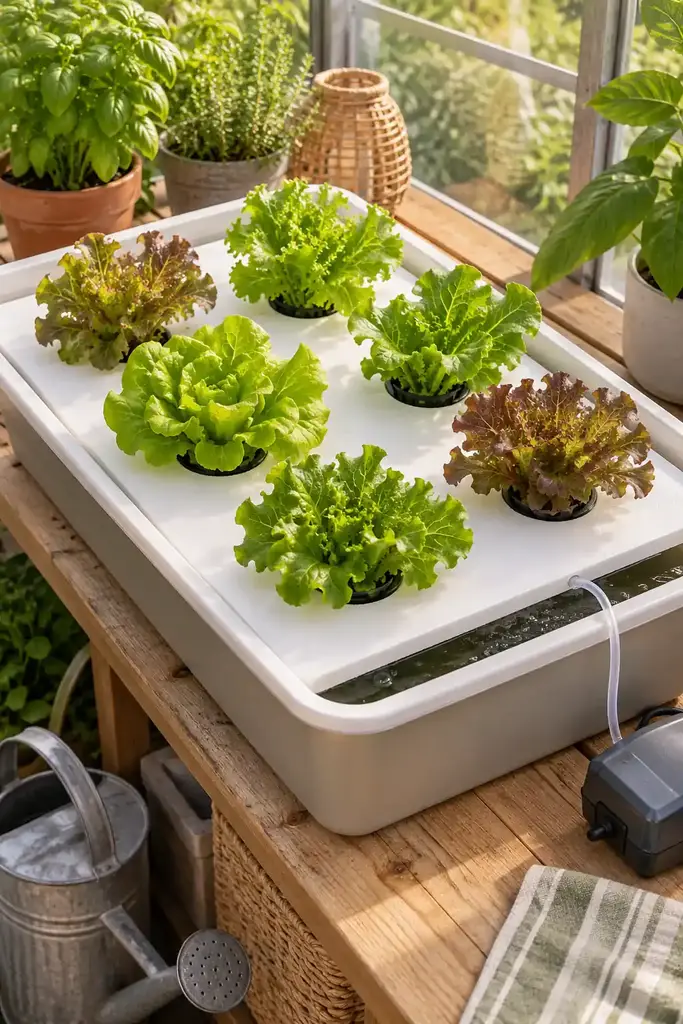
A floating raft is a wide, shallow DIY hydroponic system based on deep water culture. A sheet of food safe foam floats on the nutrient solution in a broad tub. Lettuce grows in net cups pushed through holes in the foam.
The raft rises and falls with the water, so the plants never dry out. An air pump outside the tub keeps oxygen in the water. Space the holes 6 to 8 inches apart for full heads of lettuce. Commercial lettuce farms use the same method on a much larger scale.
13. Dutch bucket tomatoes
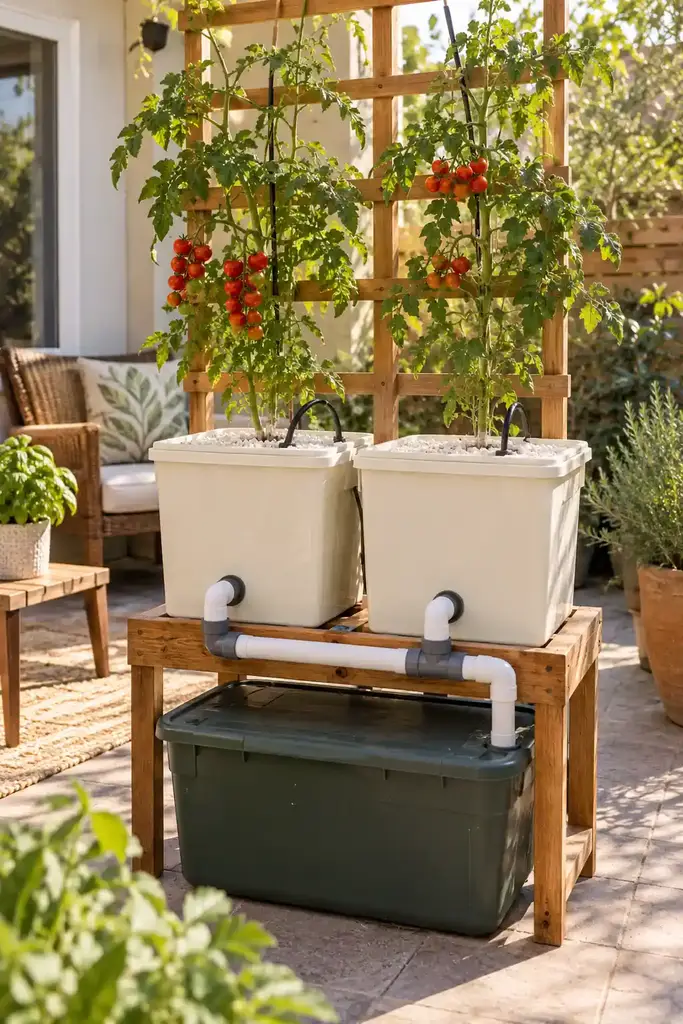
Dutch buckets suit big fruiting plants like tomatoes, cucumbers and peppers. Each bucket is filled with perlite or clay pebbles instead of standing water. A drip line feeds the base of the plant, and an elbow drain returns the extra water.
Two buckets can share one reservoir and one return pipe. This DIY hydroponic system drains after every watering, so the roots get plenty of air. Tie the vines to a trellis, because a loaded tomato plant gets heavy fast. Cherry tomatoes need a stronger nutrient mix than lettuce, with an EC of about 2.0 to 3.5 mS/cm.
Timer tip: Set the drip pump to water for about 15 minutes every two to three hours in daylight. Hot weather may call for more cycles.
14. Ebb and flow tray
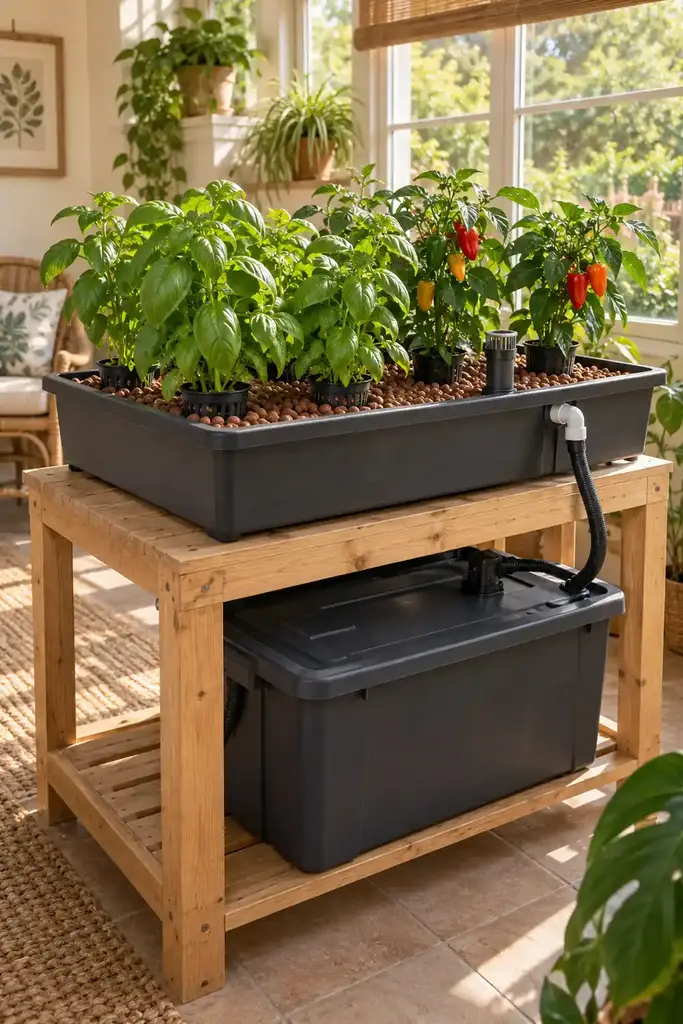
Ebb and flow, also called flood and drain, fills a grow tray with water and then empties it. A timer switches the pump on a few times a day. The tray floods, and then gravity pulls the water back down to the reservoir.
An overflow fitting sets the highest water level, so the tray never spills. Fill the pots with clay pebbles, which hold moisture between floods. Basil and small peppers both grow well in this DIY hydroponic system. The reservoir goes under the bench, out of sight and out of the light.
15. Picnic cooler lettuce garden
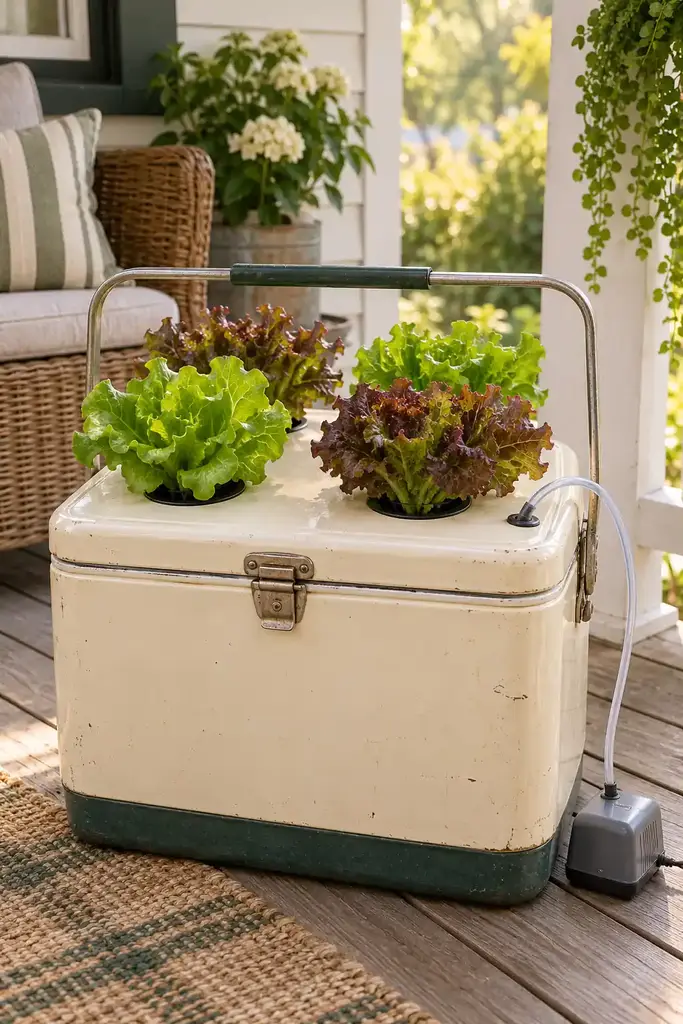
An old picnic cooler already has insulation, which a reservoir needs in hot weather. It keeps the water cooler in summer and warmer on cold nights. Drill four holes in the lid for net cups, then add an air line.
Roots take in oxygen best when the water stays below about 72°F (22°C). A cooler holds that range longer than a thin plastic tub. Keep the original handle, and you can carry the whole garden into shade on a hot day. This DIY hydroponic system fits in nicely on a cottage porch, too.
Avoid this: Never reuse a cooler that held bait or chemicals. Scrub any cooler with hot soapy water and rinse it well before you fill it.
16. Rolling cart herb garden
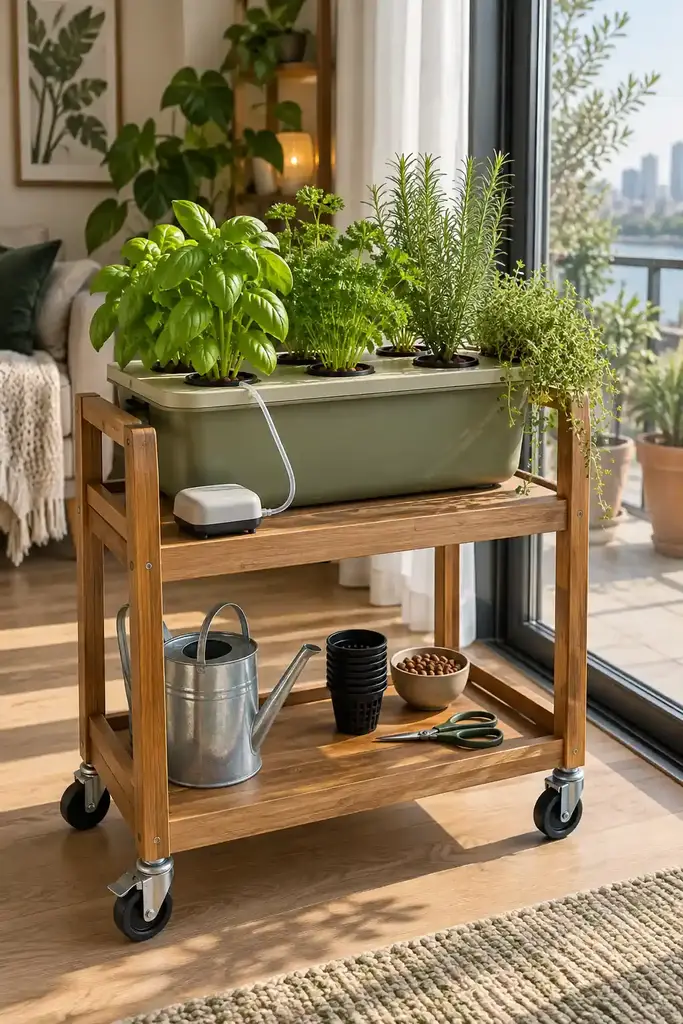
A two tier rolling cart gives you a DIY hydroponic system that follows the sun. Put a lidded reservoir of herbs on the top shelf. Scissors, spare net pots and nutrient bottles go on the lower shelf.
Choose a cart with locking casters, since a full reservoir is heavy. Roll it near a glass door in the morning, then back to a shady spot at night. Keep the air pump on the top shelf so the cord stays dry. Extra nutrient jugs can go in the garage. These garage organization ideas keep them easy to find.
17. Ceramic cachepot wick planters
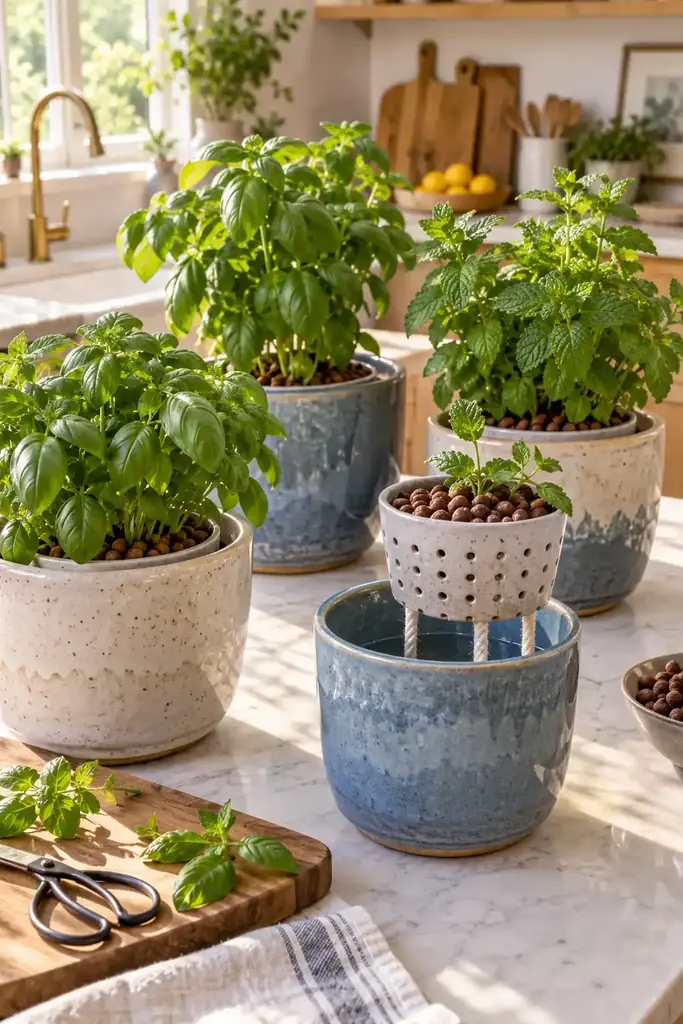
Glazed ceramic pots hide a wick setup so well that guests see only plants. Each outer cachepot holds the water and nutrients. A perforated inner pot filled with clay pebbles nests inside it.
Cotton or nylon wicks hang from the inner pot into the water. Nylon rots more slowly than cotton, so it lasts longer. Mint and basil do well here, because both like steady moisture. Of all the ideas on this list, this DIY hydroponic system looks the most like table decor.
How to choose a DIY hydroponic system for your home
Before you build a DIY hydroponic system, list the plants you want to eat. Leafy greens and herbs grow well in jars, tubs and NFT pipes. Tomatoes, peppers and cucumbers need Dutch buckets or a large DWC bucket.
Next, look at your power and space. Kratky and wick setups need no electricity at all. NFT channels, towers and ebb and flow trays need a pump, so plan for an outlet nearby. A sunny balcony suits a tower, while a dim apartment needs a grow light shelf.
| System | Pump needed | Good plants | Skill level |
|---|---|---|---|
| Kratky (jars, tubs) | No | Lettuce, basil, bok choy | Easy |
| Wick | No | Small herbs, mint | Easy |
| Deep water culture | Air pump | Lettuce, chard, kale | Easy |
| Floating raft | Air pump | Lettuce, spinach | Medium |
| NFT pipes and A-frames | Water pump | Lettuce, herbs, strawberries | Medium |
| Ebb and flow | Water pump and timer | Herbs, peppers | Medium |
| Dutch bucket | Water pump and timer | Tomatoes, cucumbers, peppers | Medium |
What you need to build a DIY hydroponic system
Most builds use the same basic parts. Buy net cups and nutrients in bulk, and the cost per setup drops fast.
- Net cups or net pots in 2 to 6 inch sizes
- Growing media such as clay pebbles, rockwool cubes or perlite
- An opaque, food grade reservoir with a lid
- A two or three part hydroponic nutrient
- A pH test kit with pH up and pH down
- An air pump and air stone for DWC and raft builds
- A small submersible pump and tubing for NFT, towers and ebb and flow
- A hole saw or step drill bit for cutting lids
Mixing nutrients and checking pH
Plants in a DIY hydroponic system get all their food from the nutrient solution. So use a nutrient made for hydroponics, not a soil fertilizer. Soil feeds often leave out micronutrients that the soil itself would normally supply.
Most leafy greens and herbs grow best at a pH between 5.5 and 6.5. Test the water after you mix in the nutrients, then adjust it with pH up or down. Change the whole solution every two to three weeks, because plants use some nutrients faster than others.
Good to know: A cheap EC or TDS meter shows how strong your nutrient mix is. Lettuce likes a gentle mix of about 0.8 to 1.2 mS/cm.
Common DIY hydroponic system mistakes
Light leaks cause the most trouble in any DIY hydroponic system. Even a small gap lets algae grow on the roots and the reservoir walls. Cover every opening, and use foam collars around the net cups.
Warm water causes the next biggest problem. Root rot spreads fast once the solution climbs above 75°F (24°C). Keep reservoirs out of afternoon sun, and drop in frozen water bottles on hot days. Also, give plants room. Lettuce heads need about 6 to 8 inches between them, or they compete for light.
Is a DIY hydroponic system cheaper than a kit?
Yes, in most cases. A countertop kit with a light often costs well over $100. A jar or tub DIY hydroponic system can cost under $20. Reuse containers and buy net cups in bulk.
Bigger builds save even more. A store bought tower can cost several hundred dollars. A PVC tower needs only a pipe, a bucket and a small pump. You pay with your time, though, so plan a full weekend for the larger builds.
FAQs about DIY hydroponic system ideas
What is the easiest hydroponic system to build?
The Kratky method is the easiest DIY hydroponic system to build. It uses a jar or tub, nutrient water and a net cup, with no pump or power. Lettuce and basil make the safest first crops.
Can I use tap water for hydroponics?
Yes, most tap water works. Leave it out for 24 hours so the chlorine can evaporate, then test the pH after you add nutrients. If your city uses chloramine, a carbon filter works better than waiting.
How often should I change the nutrient water?
Change the full solution every two to three weeks. Top up with plain water between changes as the plants drink. Kratky jars and tubs are the exception, since you leave them alone until harvest.
Which plants grow best in a homemade hydroponic setup?
Lettuce, spinach, kale, basil, mint and parsley grow fastest. Strawberries, cherry tomatoes and peppers also do well in drip or Dutch bucket setups. Root crops like carrots and potatoes are a poor fit.
Do I need a grow light?
Indoors, you need one unless a window gets six or more hours of direct sun. Setups on a sunny patio or balcony usually need no extra light.

Written by Stephanie Fallis
Mom and homemaker who shares budget friendly DIY projects, decorating tips and gardening ideas for busy families.
More about me → Christmas ideas21 DIY Christmas Cards That Are Fun to Make
 Christmas ideas22 Christmas Plants for a Festive Green Home
 Christmas ideas21 Farmhouse Christmas Decor Ideas: Simple and Rustic