
Christmas tree craft ideas can become hanging ornaments, handmade cards or tabletop Christmas trees. Choose the finished size before cutting your paper or fabric.
A folded paper tree needs crisp creases. A yarn cone needs even wrapping, while stitched felt needs a template you can repeat.
Use one sample to check your colors and proportions. Keep small offcuts for stars and trunks instead of cutting new material for every detail.
Choosing Christmas tree craft ideas by finished shape
Decide where the tree will go before choosing the material. Flat designs suit cards, while cones need a stable display surface.
| Finished piece | Material | Check |
|---|---|---|
| Raised greeting card | Quilled paper | Envelope depth |
| Flat ornament | Felt or sticks | Hanging loop |
| Tabletop tree | Yarn or folded paper | Base balance |
| Light cover | Suitable clay | Battery light access |
In this post: 16 ideas
- Clay tree cover with star openings
- Pom pom tree on a wooden base
- Folded book page tree
- Quilled paper tree greeting card
- Fabric scrap tree on a cinnamon stick
- Green button tree in a wooden frame
- Burlap ribbon tree with looped branches
- Wine cork tree with a red bow
- Beaded wire tree ornaments
- Botanical impressions in dough ornaments
- Popsicle stick trees with button decorations
- Rolled magazine paper tree on card
- Yarn wrapped cones in sage and cream
- Pinecone trees with wool pom poms
- Accordion folded paper trees
- Stitched felt tree ornaments
1. Clay tree cover with star openings

A white clay tree has overlapping branch edges and star shaped openings. Warm battery light shows through the holes. The uneven surface gives the snow colored tree visible texture.
For clay Christmas tree craft ideas, cut stars before joining the cone so the clay keeps its shape. Use a clay suitable for a hollow decorative cover. Check the size around your battery light before joining the sides. Cut openings before drying and keep the base open for access. Follow the clay manufacturer’s instructions for thickness and drying. Use a battery light inside the finished cover.
2. Pom pom tree on a wooden base
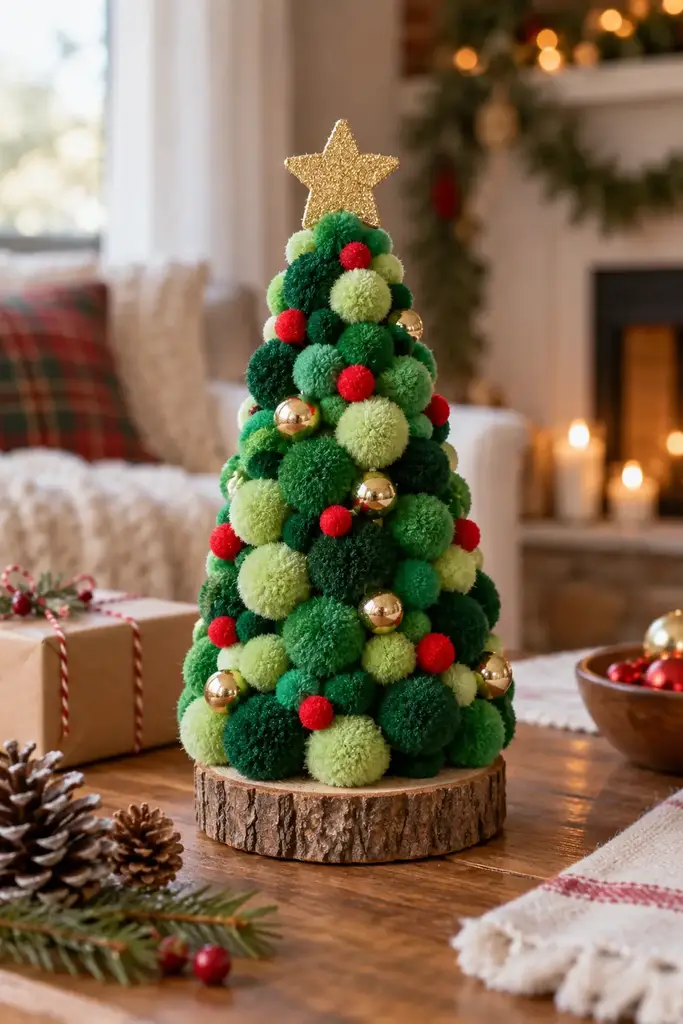
Green pom poms cover a cone above a round wooden base. Small red and gold accents separate the larger green pieces. A gold star finishes the top. Pom pom Christmas tree craft ideas need smaller pieces near the point to keep the outline clear.
Attach the largest pom poms near the bottom, then reduce their size toward the point. Place them closely enough to cover the support. Check the cone from several angles before filling the gaps. Keep the wooden base wider than the lower cone, so the decoration has room to balance.
Keep one flat ornament as a gift tag. These DIY Christmas gifts give more wrapping combinations.
3. Folded book page tree
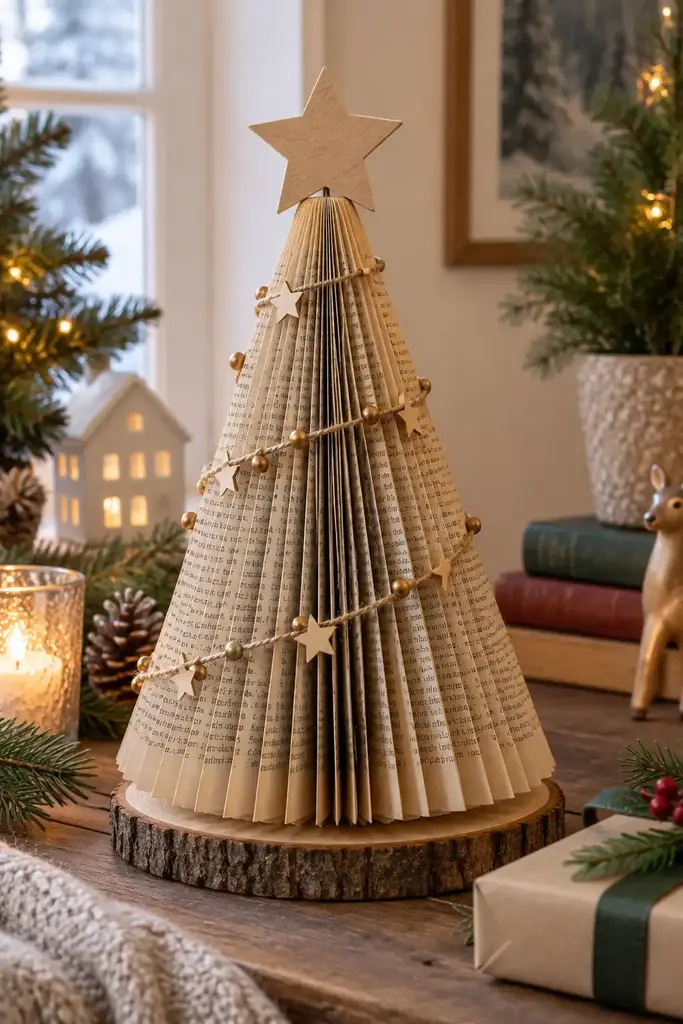
Folded book pages form a freestanding tree with a wooden star on top. The repeated folds create narrow vertical ridges. A short star garland crosses the front. Book based Christmas tree craft ideas depend on repeated creases in the same position.
Use a damaged book that you are comfortable repurposing. Test the fold sequence on a few pages before continuing. Keep each crease in the same position, so the finished tree opens evenly. Add decorations after checking it balances. These handmade Christmas gifts include more paper projects.
4. Quilled paper tree greeting card
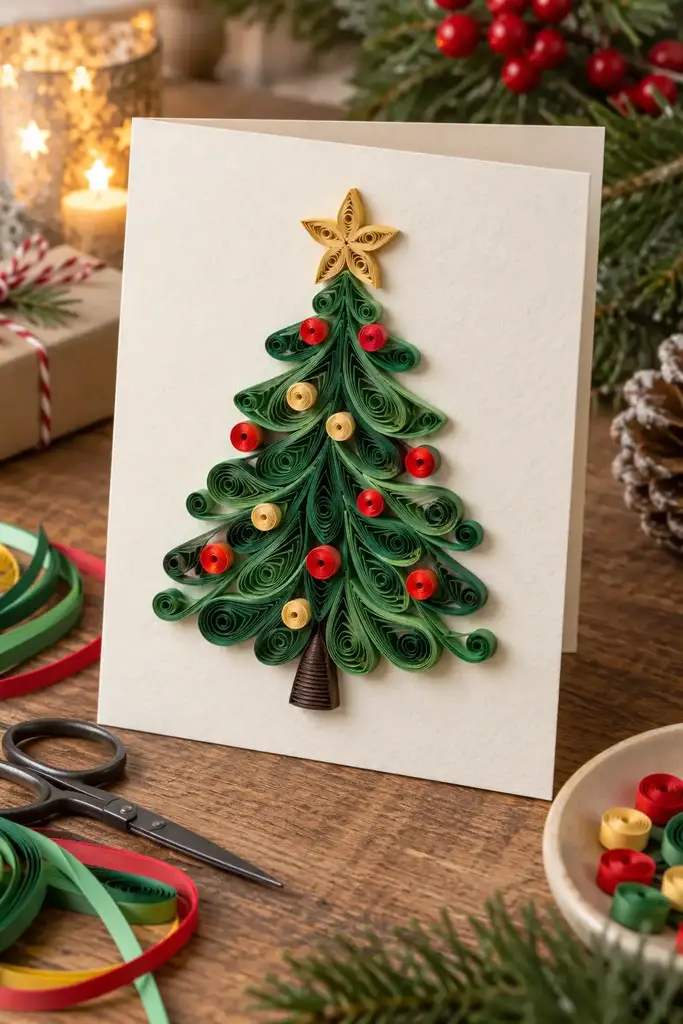
Green paper coils form branches on a cream card. Small red and gold circles fill the spaces between them. A narrow brown strip forms the trunk. Quilled Christmas tree craft ideas need space inside the envelope for raised paper coils.
Quilling shapes narrow paper strips into coils that you glue onto a surface. Roll several loose coils, then pinch one end to make branch shapes. Arrange them without glue before building the tree upward. Use small adhesive drops, since excess glue can wrinkle the card.
Use a slightly larger envelope for raised paper cards. Check that it closes without flattening the coils.
You may also like
5. Fabric scrap tree on a cinnamon stick

Short fabric strips spread outward from a cinnamon stick trunk. Green and cream prints alternate beneath a button and twine bow. The strips become shorter toward the top. Fabric Christmas tree craft ideas can use shorter scraps near the upper branches.
Tie the strips around the stick before trimming their ends. Keep the lowest strips longest, then cut a gradual triangle upward. Pull gently on each knot to check it holds. Use these DIY Christmas gift projects for other uses for fabric offcuts.
6. Green button tree in a wooden frame
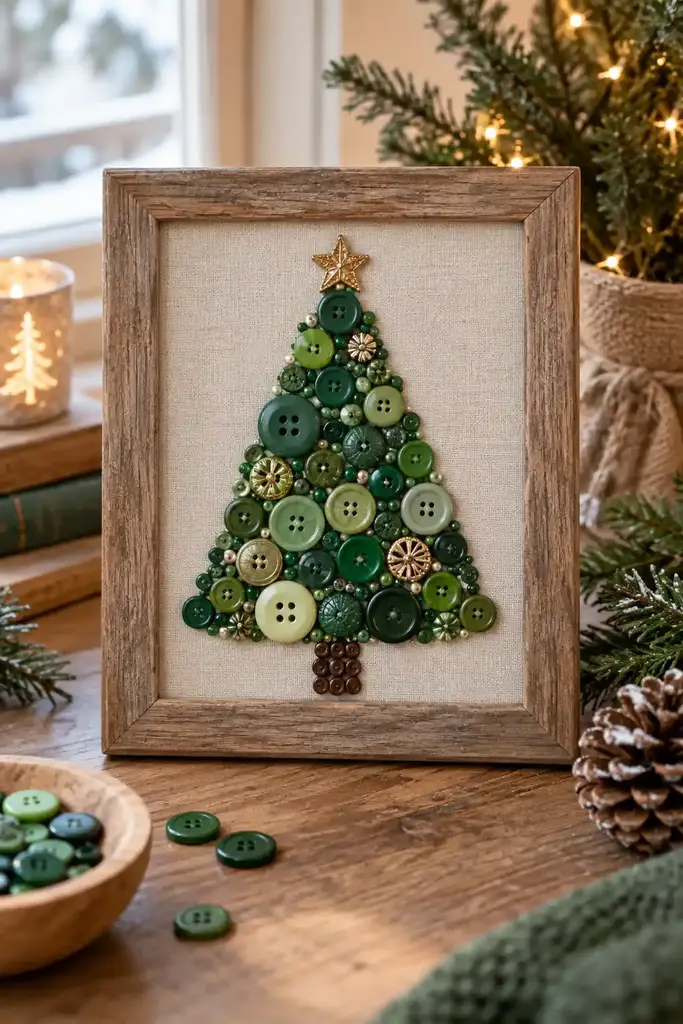
Green buttons form a triangular tree on a pale fabric background. Small gold buttons and a wooden star provide separate details. The frame contains the whole design.
For button Christmas tree craft ideas, arrange several greens together before choosing the backing fabric. Draw a faint triangle on the backing and arrange the largest buttons first. Fill gaps with smaller buttons without crowding the edges. Sew or attach them with an adhesive suited to the backing. Check the depth of the frame before closing it, especially if it has glass.
7. Burlap ribbon tree with looped branches

Wide burlap loops surround a cone with short evergreen sprigs between them. Small pinecones and red berries repeat around the tree. A coarse star follows the burlap texture. Ribbon Christmas tree craft ideas hide their joins beneath the next row of loops.
Cut several ribbon pieces to the same length and fold each into a loop. Attach the first row near the cone base, then cover the joins with the next row. Work upward with shorter loops. Check the cone from the side before placing the final star.
8. Wine cork tree with a red bow
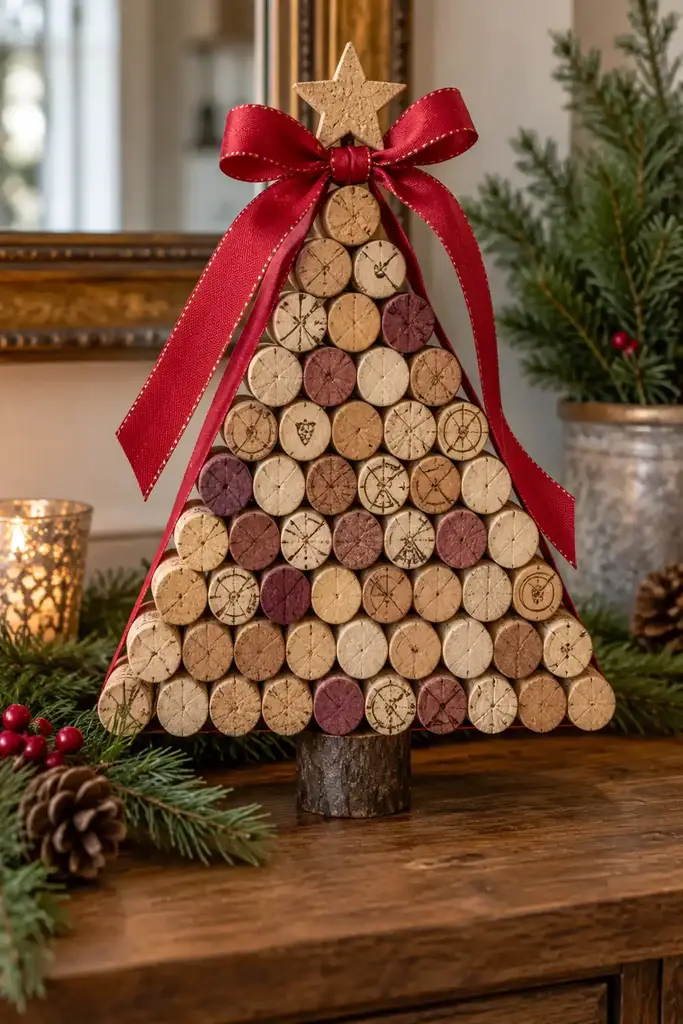
Circular cork ends form a flat tree shape above a short trunk. Natural brown tones vary across the triangle. A large red bow is at the top. Cork Christmas tree craft ideas need a backing that supports the full arrangement.
Lay the corks flat on a backing board before attaching them. Build the widest row first, then reduce the number of corks in each row. Use a support behind the whole triangle rather than relying on the cork joins alone. Let the adhesive cure before lifting the decoration.
You may also like
 You may also likeChristmas Table Decorations: 18 Stunning Ideas to Try
9. Beaded wire tree ornaments
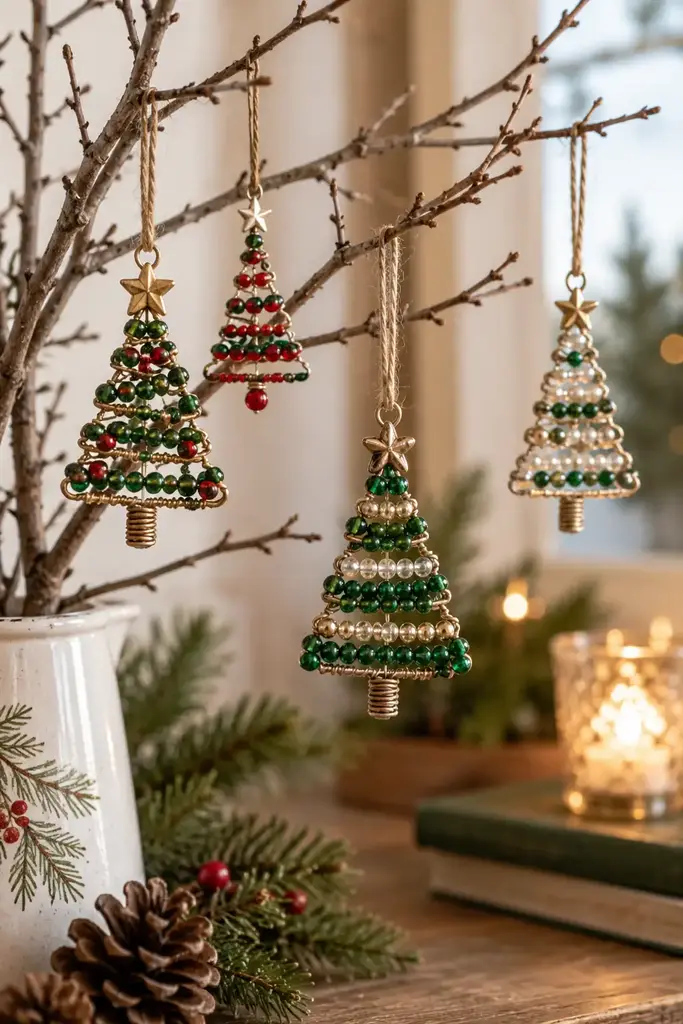
Green, red and gold beads follow triangular wire outlines hanging from bare branches. Horizontal bead rows suggest garlands. Small stars and separate loops finish the tops. Wire Christmas tree craft ideas need enclosed ends so the beads remain secure.
Choose wire that fits the bead holes and holds the planned shape. Bend one sample before cutting the remaining wire. Thread the beads, then secure the ends so none can slide free. Cover or turn sharp wire tips inward. Keep loose beads away from small children.
10. Botanical impressions in dough ornaments
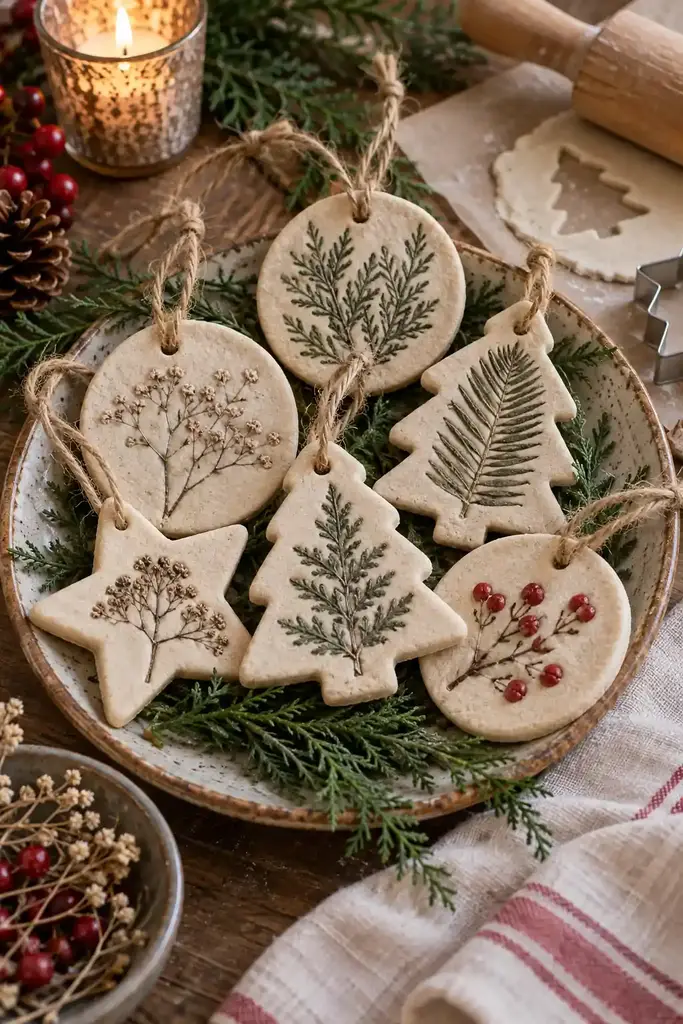
Pale ornaments have pressed leaf patterns, including evergreen branches and fern shapes. The group includes tree outlines alongside round and star shapes. Twine passes through holes near the tops. Imprinted Christmas tree craft ideas need the plant removed before cutting the outer shape.
Press a clean leaf or sprig into prepared dough before removing it carefully. Cut the outer shape after checking the impression. Make the hanging hole before drying. Follow a tested dough recipe and its drying directions. Keep the finished decorations dry and separate from food.
11. Popsicle stick trees with button decorations
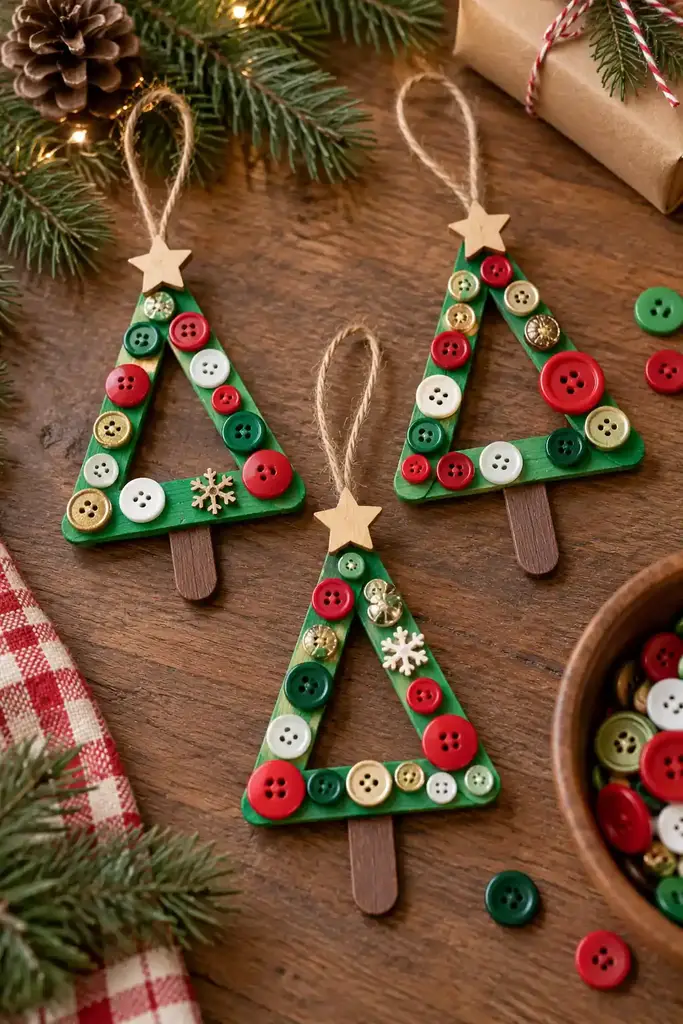
Green sticks form open triangles with short brown trunks beneath them. Red, green and white buttons decorate the edges. A wooden star covers the top join. Stick based Christmas tree craft ideas need flat joins before the decorations go on.
Arrange three sticks on a flat surface before gluing the corners. Attach the trunk to the back, then add the hanging loop. Let the structure set before adding buttons. Keep the decoration flat while drying, so the joins do not twist. An adult should handle hot glue if used.
12. Rolled magazine paper tree on card

Short rolled paper tubes form branch rows on a brown card. Printed colors remain visible within the rolls. A small star and narrow trunk complete the tree. Rolled paper Christmas tree craft ideas need a clear border around the raised tubes.
Roll magazine strips around a pencil, then slide the pencil out. Arrange the tubes from longest at the bottom to shortest near the top. Test their placement before gluing. Leave a clear card border, so the raised paper does not catch the envelope edges.
You may also like
13. Yarn wrapped cones in sage and cream
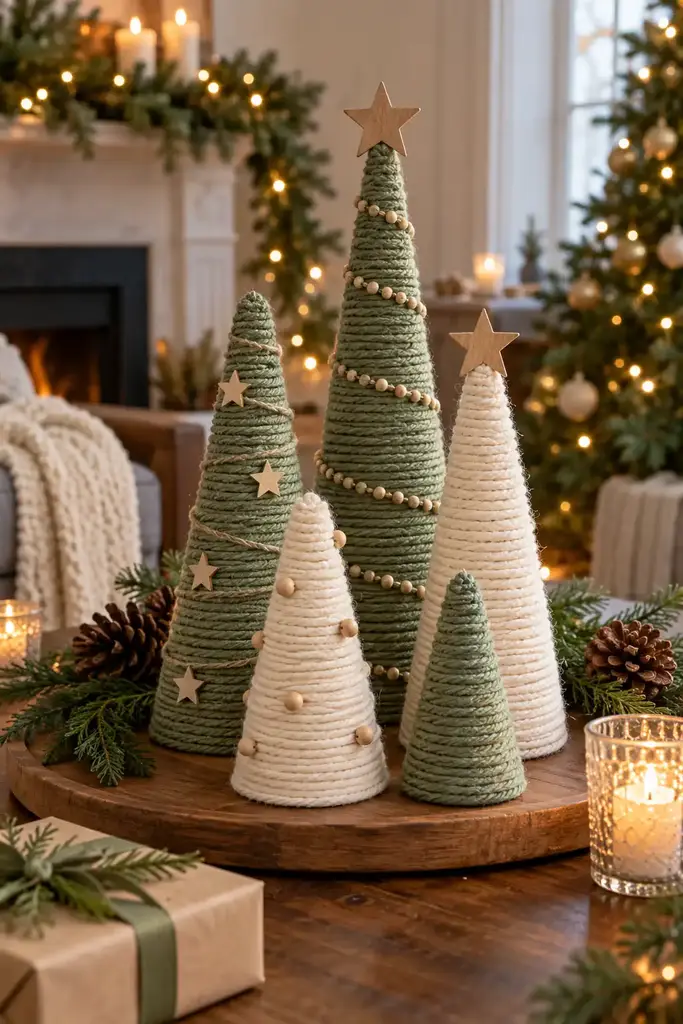
Sage and cream yarn covers tall narrow cones. Small wooden stars mark the tops. The horizontal wrapping lines remain visible across each tree. Yarn Christmas tree craft ideas need close wraps to hide the support underneath.
Begin at the wider base and wrap upward with steady tension. Add small adhesive points where the yarn needs support. Keep neighboring turns close enough to hide the cone. Finish the narrow tip with a shorter length of yarn, then attach the star after the covering dries.
14. Pinecone trees with wool pom poms

Small pinecones become trees on wooden slices. Red, green and cream pom poms fill gaps between the scales. Tiny stars mark their points. Pinecone Christmas tree craft ideas need a stable base before ornaments are attached.
Choose cones with a broad enough base to attach securely. Test their balance before decorating. Add pom poms to separate scales instead of filling every opening. Attach each cone to its wooden slice, then let it dry before moving. Keep the finished decoration away from moisture.
15. Accordion folded paper trees

Green paper trees have repeated folded ridges and small wooden stars. Different heights create a group across the table. The folded layers make the tree shapes visible from several angles. Folded paper Christmas tree craft ideas need even creases so the branches open consistently.
Mark even fold lines before creasing the paper. Test one section to check that it opens without tearing. Build the tree from the chosen folding pattern, keeping the lower section wider. Place finished trees on a level surface and check their balance before adding heavier toppers.
16. Stitched felt tree ornaments

Green felt trees have visible edge stitches, buttons and small star toppers. Their branch levels become narrower toward the top. Twine loops allow them to hang from a larger tree.
Felt Christmas tree craft ideas can use contrasting thread when you want the edge stitching to remain visible. Cut matching front and back shapes using one template. Sew buttons and other details onto the front before joining both pieces. Add a little stuffing if you want a thicker ornament. Stitch the hanging loop into the top seam, then close the remaining gap.
Choosing Christmas tree craft ideas for cards or shelves
Flat button and fabric designs suit cards or framed art. Cones and folded paper trees need a level shelf or table.
Check the finished depth before choosing packaging. A raised design needs more room than an ordinary greeting card.
Paper Christmas tree crafts with leftover materials
Keep narrow magazine strips for rolled trees and larger sheets for folded designs. Test the paper strength before making repeated folds.
These Christmas crafts for gifts include more uses for small paper pieces.
Packing handmade tree ornaments
Separate wire, paper and fabric ornaments before storing them. Place raised decorations in shallow boxes rather than pressing them flat.
Keep hanging loops visible when packing. Label boxes by material, so fragile paper pieces are easy to find.
Questions about Christmas tree craft ideas
How do I stop yarn slipping in cone shaped Christmas tree craft ideas?
Hold the first yarn turn with adhesive and let it set before wrapping upward. Keep tension even rather than stretching the yarn.
Can I send a quilled tree in a normal envelope?
Only if it closes without pressing the coils flat. A shallow box or padded card mailer gives raised designs more room.
When can I paint a clay tree cover?
Wait until the clay has dried throughout, following its label. A dry outer surface does not confirm the center is ready.
For Crayola clay, check the maker’s drying instructions before painting.
How do I keep a pom pom tree from leaning?
Check the base on a level table before the adhesive sets. Turn the tree a quarter turn as you add each group.

Written by Stephanie Fallis
Mom and homemaker who shares budget friendly DIY projects, decorating tips and gardening ideas for busy families.
More about me → UncategorizedIndoor Christmas Decorations: 19 Stunning Ideas to Try
 UncategorizedLuxury Christmas Decor: 21 Stunning Ideas for Your Home
 Christmas ideas19 Classroom Christmas Crafts Kids Will Love