
3D self portrait ideas give you a fun way to put yourself on the wall. Instead of a flat photo, you build a face that pops out with texture and depth. You can use felt, paper, tiles, shells, or even cookie dough. Each material brings a different mood to your home.
The best part? You do not need to be a trained artist. Most of these projects start with a simple photo and a few basic supplies. Then you build the face one layer at a time. As a result, even small mistakes look like part of the charm.
In this guide, you will find seven 3D self portrait ideas with supplies, easy steps, and styling tips. After that, we compare time and budget for each one. Finally, we cover likeness tips, display ideas, common mistakes, and quick answers to popular questions.
What Makes a Self Portrait 3D?
A regular portrait lives on a flat surface. A 3D portrait, on the other hand, rises off that surface. Raised felt, stacked paper, or chunky shells catch light and cast small shadows. Those shadows change through the day, so the piece keeps looking fresh. That depth is why 3D art works so well as home decor. It adds texture to a plain wall without extra furniture. That depth is what separates 3D self portrait ideas from flat drawings.
In this post: 7 ideas
1. Felt Face Wall Hanging
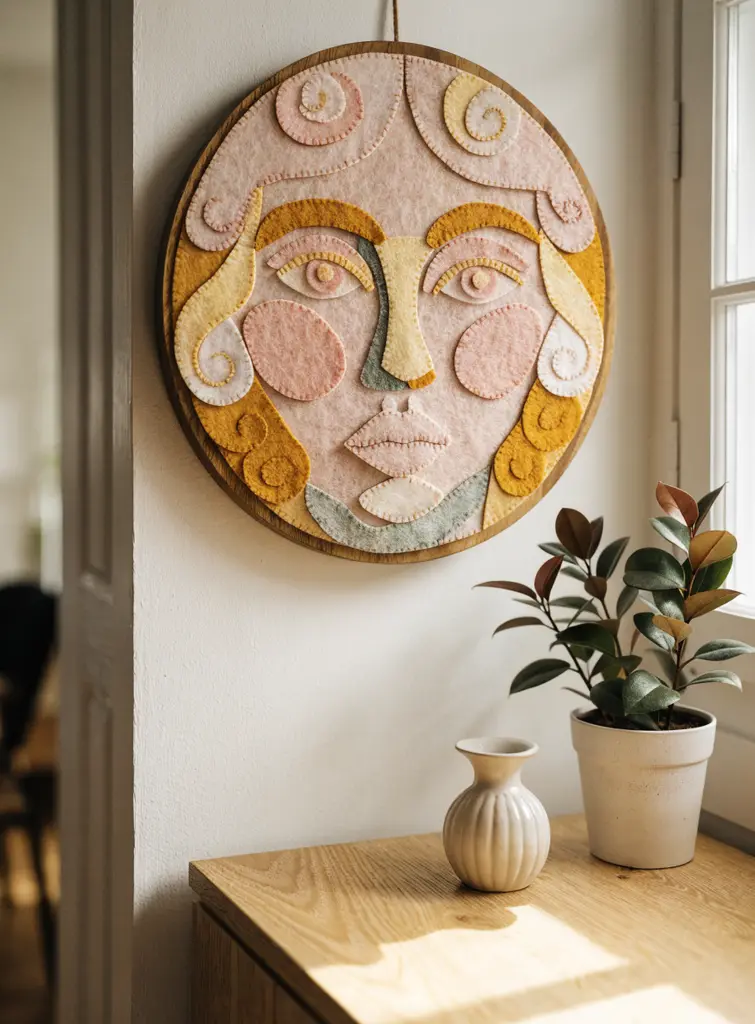
A felt face feels soft, warm, and friendly. You cut simple shapes from wool felt and layer them into a face. Because felt has no fraying edges, it forgives beginners. Also, you can glue or stitch the pieces, whichever feels easier. Felt is one of the friendliest 3D self portrait ideas for kids, since it is soft and easy to cut.
What you need: wool felt sheets in 4 to 6 colors, a round wooden hoop or board, fabric glue, embroidery thread, sharp scissors.
How to make it:
- Print your photo and trace the main shapes: face, hair, eyes, lips.
- Use the tracings as paper patterns and cut them from felt.
- Glue the largest shape first, then build smaller pieces on top.
- Add stitched details like lashes or freckles with thread.
Styling tip: Pick felt colors from your room, not from your real skin tone. Blush, mustard, and sage look lovely against a warm white wall. A round frame also softens a room full of straight lines.
2. Layered Paper Silhouette
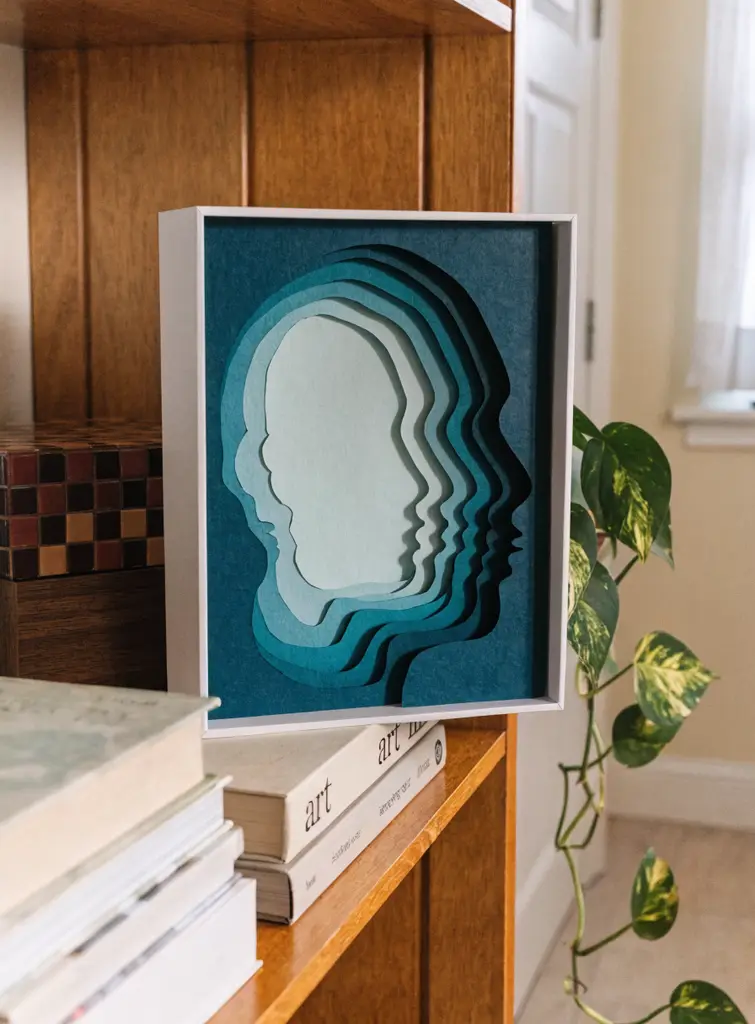
This idea uses your side profile, which makes likeness much easier. You cut the same outline several times, each a little smaller. Then you stack the layers with foam spacers between them. The gaps create real shadows and a strong sense of depth. Paper silhouettes are budget 3D self portrait ideas that need only card stock and foam tape.
What you need: 6 to 10 sheets of cardstock in one color family, a craft knife, a cutting mat, foam tape, a deep box frame.
How to make it:
- Take a clear side photo against a plain wall.
- Trace the outline and draw smaller copies inside it, about 1 cm apart.
- Cut each layer from a different shade, dark to light.
- Stack them with foam tape and mount inside the box frame.
Styling tip: A gradient from deep teal to mint looks calm and modern. Place the frame on a bookshelf so side light hits the edges. Also, a white frame keeps the colors crisp.
3. Broken Tile Mosaic Portrait
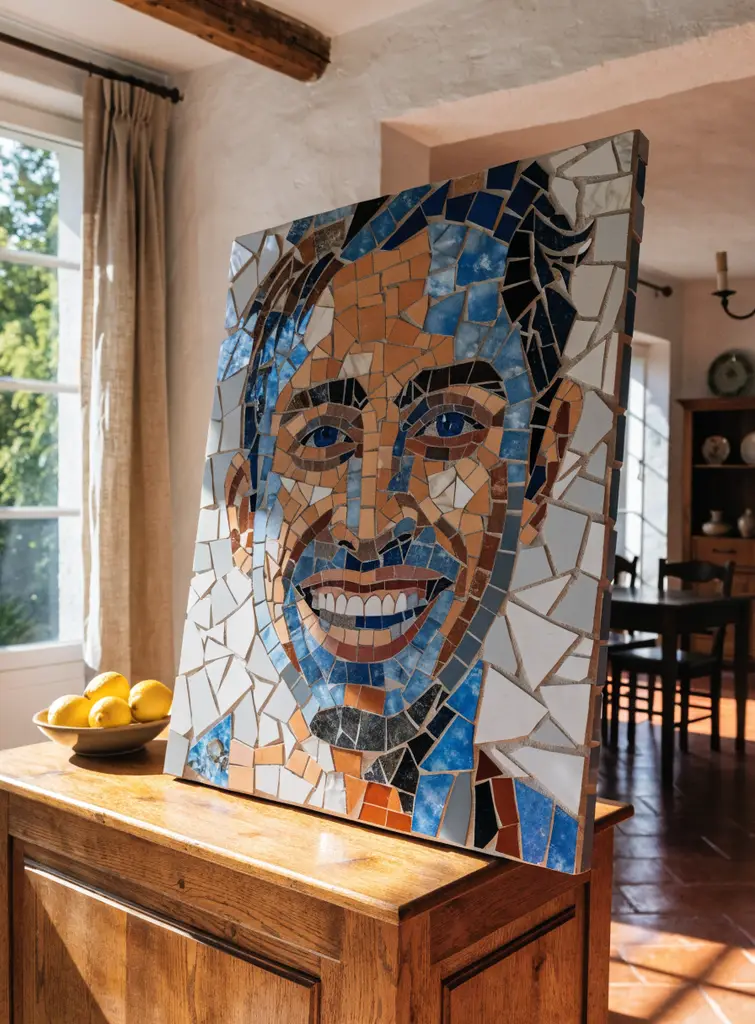
A mosaic portrait turns chipped plates and spare tiles into bold art. Every piece has a slightly different height and angle. As a result, the surface sparkles when sunlight moves across it. This project takes patience, but it lasts for decades. Mosaic 3D self portrait ideas take longer, but they last for decades.
What you need: old tiles or ceramic plates, tile nippers, a sturdy wooden board, tile adhesive, grout, safety glasses, gloves.
How to make it:
- Sketch your face on the board with a marker.
- Break tiles inside a towel, then shape pieces with nippers.
- Glue the eyes, nose, and mouth first, since they define the look.
- Fill the background last, then grout and wipe the surface clean.
Styling tip: Blue and terracotta suit Mediterranean or farmhouse rooms. Lean the panel on a sideboard instead of hanging it. Mosaic boards get heavy, so leaning saves your wall.
 You may also likeGarage Organization: 19 Stunning Ideas to Declutter Your Space
4. Seashell Coastal Portrait
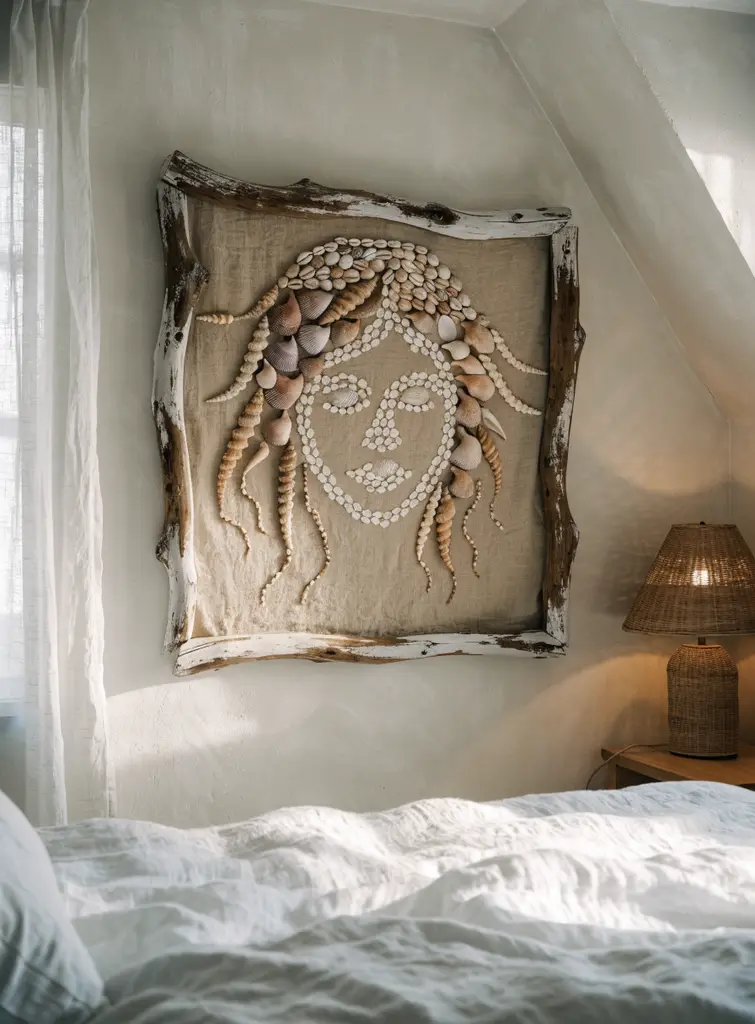
Do you collect shells from every beach trip? Then turn them into a portrait that tells your travel story. Small round shells work well for eyes and lips. Long spiral shells, meanwhile, make great flowing hair. Coastal 3D self portrait ideas like this suit beach houses and bathrooms.
What you need: clean, dry shells in mixed sizes, a linen or burlap canvas, strong craft glue or a hot glue gun, a driftwood or whitewashed frame.
How to make it:
- Sort your shells by size and color before you start.
- Draw a simple face outline on the linen with chalk.
- Glue tiny white shells along the outline first.
- Build the hair outward with bigger shells for extra volume.
Styling tip: Hang it above a bed with white linen bedding for a breezy coastal look. For more bedroom wall ideas, browse these bedroom backdrop ideas. Keep the rest of the wall bare so the shells stand out.
5. Quilled Paper Portrait
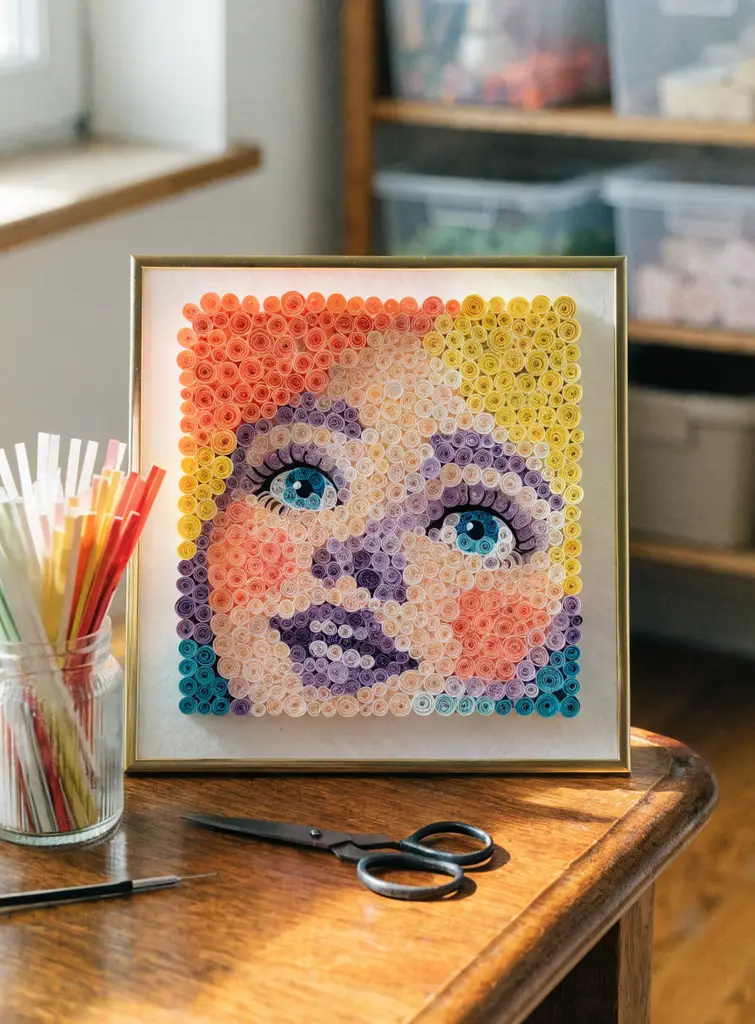
Quilling means rolling thin paper strips into tight coils. You then glue the coils on their edges to fill a face. Up close, the surface looks like a colorful honeycomb. From a few steps back, however, your face appears clearly. Quilling suits patient crafters who want detailed 3D self portrait ideas. Read about the history of quilling for more pattern ideas.
What you need: quilling paper strips, a slotted quilling tool, white craft glue, a stiff white board, tweezers, a thin frame.
How to make it:
- Print a high contrast version of your photo.
- Split it into color zones, like a paint by number sheet.
- Roll coils in each color and glue them zone by zone.
- Use darker coils around the eyes to add expression.
Styling tip: Bright coral, yellow, and lilac feel playful in a craft room or a teen space. For dorm styling inspiration, check out these college apartment room ideas. A thin gold frame adds a polished finish.
6. Self Portrait Sugar Cookies
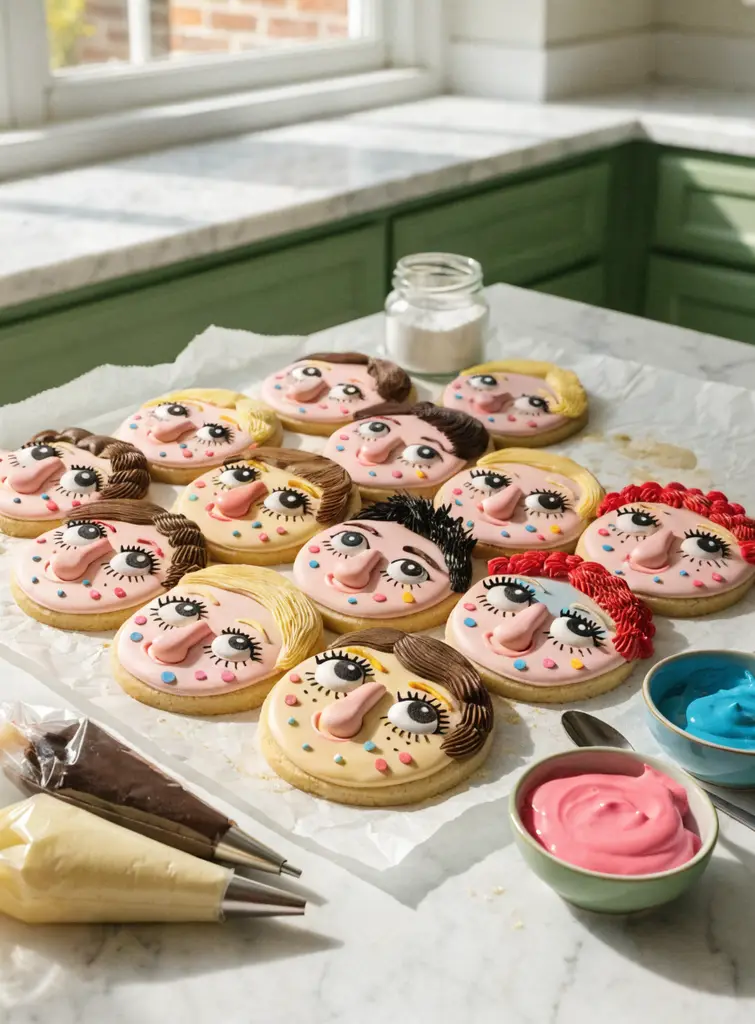
Not every 3D portrait needs to hang on a wall. Portrait cookies make a sweet party activity for birthdays or family nights. Everyone decorates a cookie that looks like them. Then you snap a photo of the full batch before anyone takes a bite. Edible 3D self portrait ideas make a fun party activity.
What you need: round sugar cookies, royal icing in skin and hair colors, piping bags with small tips, sprinkles, candy eyes.
How to make it:
- Flood each cookie with a base skin color and let it set for an hour.
- Pipe raised hair in swirls, spikes, or curls.
- Add a small blob of icing for a raised nose.
- Finish with sprinkle freckles and piped smiles.
Styling tip: Lay the cookies on parchment across a kitchen island. Label each one with a tiny name card for a fun display. Afterward, frame the group photo as a family keepsake.
7. Shadow Box Self Portrait Scene
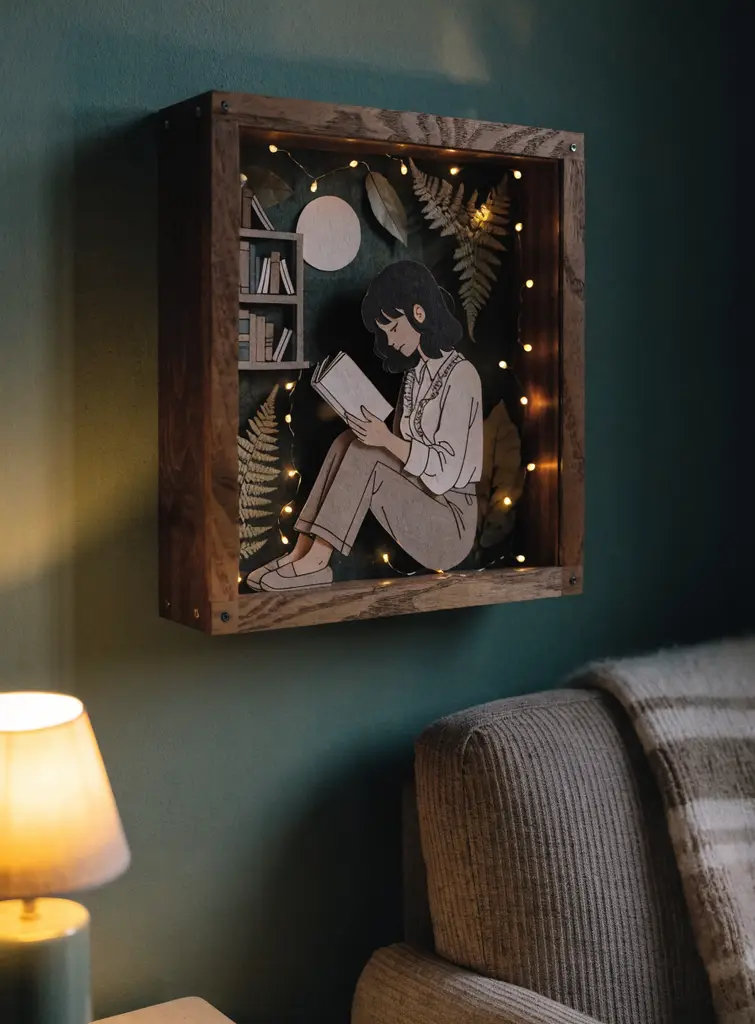
A shadow box lets you show more than a face. You can build a tiny scene that shows your hobbies or favorite spot. Paper cutouts stand at different depths inside the box. Add fairy lights, and the whole scene glows at night. Shadow boxes protect delicate 3D self portrait ideas from dust.
What you need: a deep wooden shadow box, cardstock, a craft knife, foam spacers, battery fairy lights, dried leaves or ferns.
How to make it:
- Draw yourself doing a favorite activity, like reading or painting.
- Cut background details first, such as shelves, a moon, or plants.
- Mount each layer on spacers to push it forward.
- Weave fairy lights between the layers and hide the battery pack at the back.
Styling tip: A dark green wall makes the warm lights stand out. Place the box near an armchair to create a reading corner. You will find more ideas for this mood in our dark academia bedroom ideas.
Quick Comparison: Which Idea Suits You?
| Idea | Skill Level | Time | Budget | Best Spot |
|---|---|---|---|---|
| Felt Face Wall Hanging | Beginner | 3 to 4 hours | Low | Console wall |
| Layered Paper Silhouette | Beginner | 2 to 3 hours | Low | Bookshelf |
| Broken Tile Mosaic | Advanced | 2 to 3 days | Medium | Dining room |
| Seashell Coastal Portrait | Intermediate | 4 to 6 hours | Low | Above the bed |
| Quilled Paper Portrait | Advanced | 1 to 2 days | Low | Craft room or teen room |
| Portrait Sugar Cookies | Beginner | 2 hours | Low | Party table |
| Shadow Box Scene | Intermediate | 5 to 6 hours | Medium | Reading corner |
How to Get a Good Likeness
A strong likeness starts with a good photo. First, shoot in soft daylight so your features show clearly. Next, face the camera straight on, or turn fully sideways for a profile. Then, raise the contrast in a free photo app. This step makes the main shapes easy to trace. Use this table to match 3D self portrait ideas to your time and budget. A good likeness makes any of these 3D self portrait ideas more personal.
Also, do not chase every tiny detail. People recognize a face by hairstyle, eyebrows, and face shape. So nail those three and keep the rest simple. Glasses, freckles, or a signature earring also help a lot.
Where to Display Your 3D Self Portrait at Home
Side light matters more than anything else. Hang or place your piece near a window so shadows form across the layers. For example, a hallway beside a window works well. A reading corner also makes a good home for it. Hang 3D self portrait ideas at eye level, with the center about 57 inches from the floor.
Here are a few easy spots to try:
- Above a console table: great for felt and mosaic pieces.
- On a bookshelf: good for layered paper and small box frames.
- Above the bed: great for a framed shell portrait.
- In a gallery wall: mix your portrait with family photos for a personal story.
If you want a softer mood, pair the piece with warm lamps and textured throws. These cozy bedroom ideas show how texture and light work together.
Common Mistakes to Avoid
Many first projects fail because of the base, not the art. Thin cardboard bends under glue, so always pick a stiff board. Likewise, heavy materials like tiles need strong hangers and wall anchors. Many 3D self portrait ideas fail when the base is too thin to hold the weight.
Another mistake is using too many colors. Stick to four or five shades for a clean look. Finally, do not skip drying time. Rushing glue or grout leads to sliding pieces and uneven layers.
FAQs About 3D Self Portrait Ideas
What is the easiest 3D self portrait for beginners?
The layered paper silhouette is the easiest. You only trace one outline and cut smaller copies. Felt faces come a close second.
How long does a 3D self portrait take?
Most paper and felt projects take one afternoon. Mosaic and quilling projects can take a full weekend or more.
Can kids make these 3D self portrait ideas?
Yes. Kids enjoy felt faces, portrait cookies, and simple paper layers. However, an adult should handle craft knives, hot glue, and tile nippers.
How do I protect a 3D portrait from dust?
A deep box frame with glass keeps dust off paper and felt. For shells and tiles, a soft makeup brush cleans the surface gently.
Do I need to look exactly like the portrait?
Not at all. A 3D self portrait shows your style and personality. Colors, hobbies, and small details often say more than an exact likeness.
Start your own 3D self portrait
These 3D self portrait ideas turn your own face into decor that feels personal. Pick the material that matches your room and your patience level. Then start small, enjoy the process, and let the finished piece add a little of you to your home. Pick one of these 3D self portrait ideas and start with the simplest material you have. Save this list of 3D self portrait ideas for your next rainy weekend.

Written by Stephanie Fallis
Mom and homemaker who shares budget friendly DIY projects, decorating tips and gardening ideas for busy families.
More about me → UncategorizedPatio Decorating Ideas: 20 Stunning Ways to Style Your Space
 UncategorizedStudio Apartment Ideas: 18 Stunning Layouts to Try
 UncategorizedFridge Organization: 18 Stunning Ideas to Try Right Now